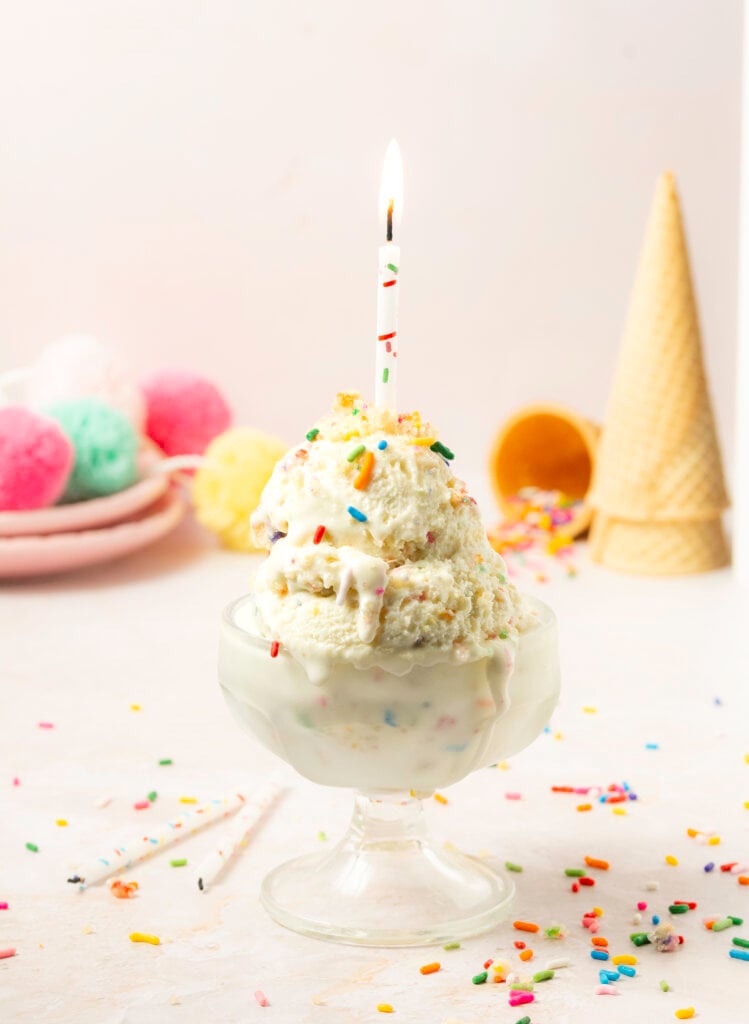
Funfetti Birthday Cake Ice Cream
Looking to celebrate with something other than a funfetti cake? This funfetti birthday cake ice cream is the perfect fill-in! It's a cake-batter flavored custard ice cream generously layered with still-soft crumbles of an easy funfetti birthday cake you make in the microwave!
This ice cream, like my strawberry cheesecake ice cream, uses cream cheese which helps to deliver a smooth and buttery flavor without the addition of actual butter which would give an overly oily mouthfeel. Not just that but the addition of cream cheese helps to act as an additional emulsifier for the egg yolks making this recipe prefect for custard ice cream beginners since it's more forgiving at higher temperatures and makes it (almost) impossible to mess up and curdle the ice cream!
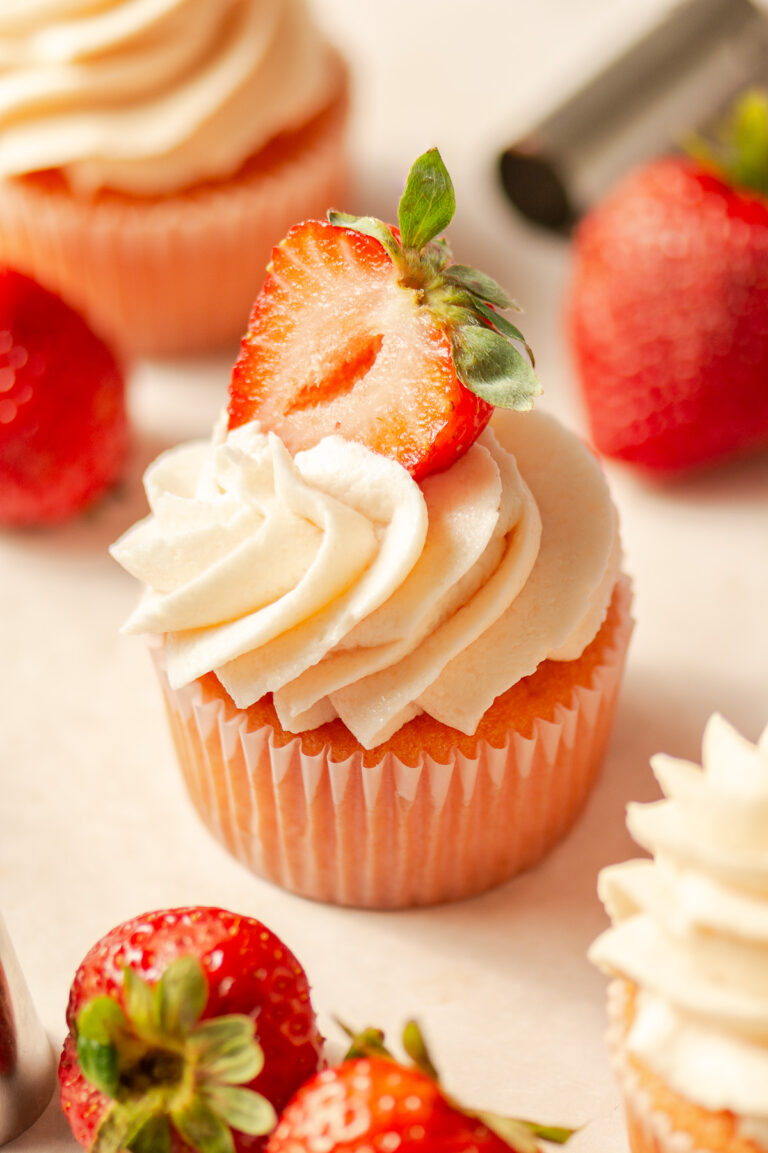
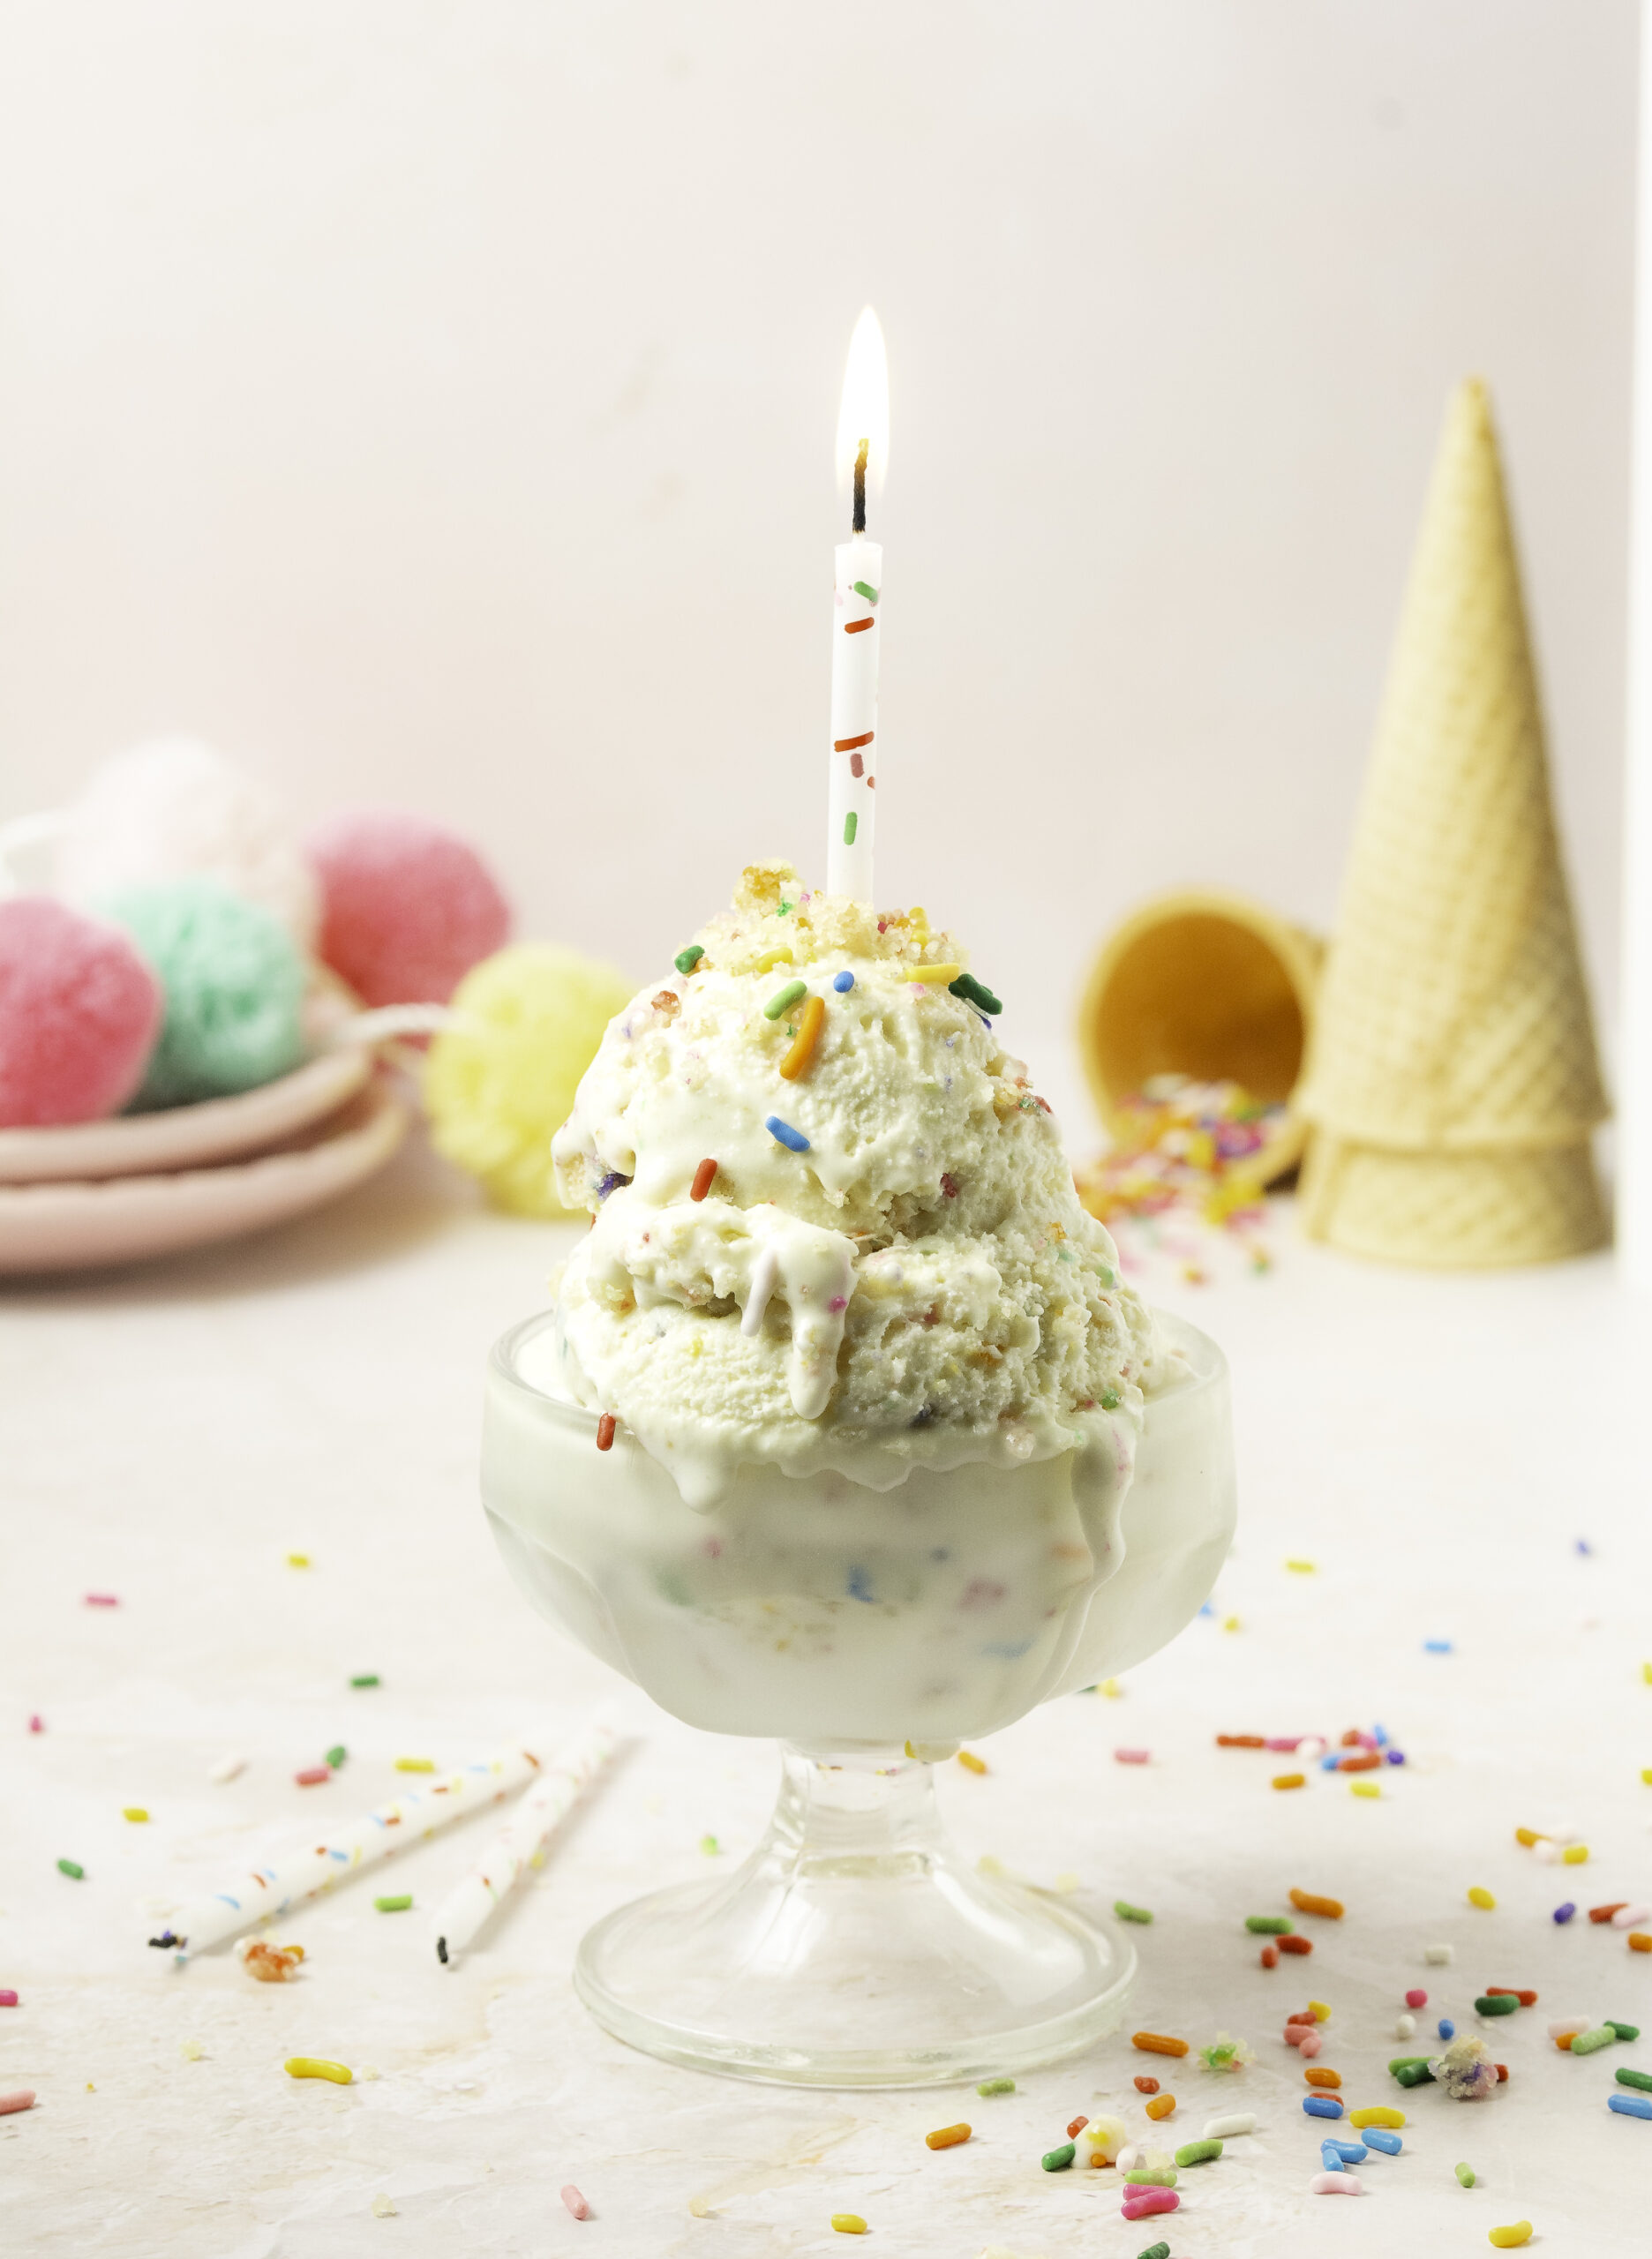
Impress all your party guests with this ice cream! Enjoy it in a bowl, in cone or even sandwiched between two birthday funfetti sugar cookies or these fudgy chocolate brownie cookies. However you decide to enjoy this funfetti birthday cake ice cream it'll be hard to resist coming back for seconds and thirds!
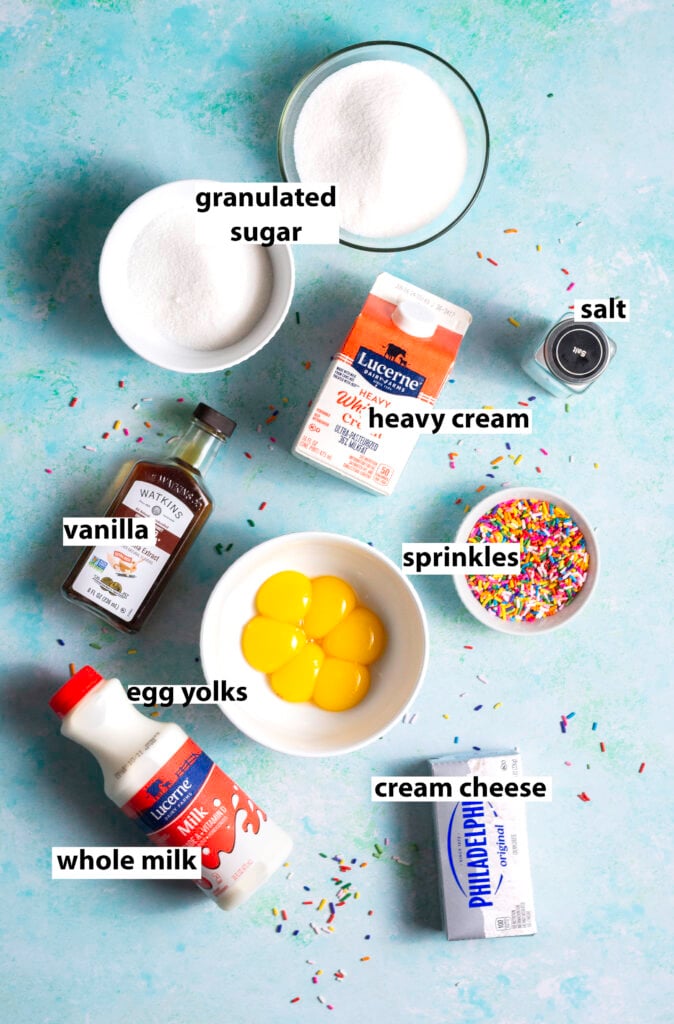
ingredients for the ice cream base
- Whole milk. The high ratio of water to fat allows the ice cream to actually freeze and be firm enough for scooping.
- Heavy cream. Contributes butterfat bringing out the other flavors and trapping air during churning for a lighter, less icy texture.
- Egg yolks. Function as both a thickening agent for the custard as well as for a "cake batter" flavor negating the need for flour.
- Cream cheese. Gives a "buttery," flavor to the ice cream base without adding actual butter that could cause an oily mouthfeel.
- Granulated sugar. The "sweet" in this sweet treat.
- Sprinkles. A must for any funfetti flavor!
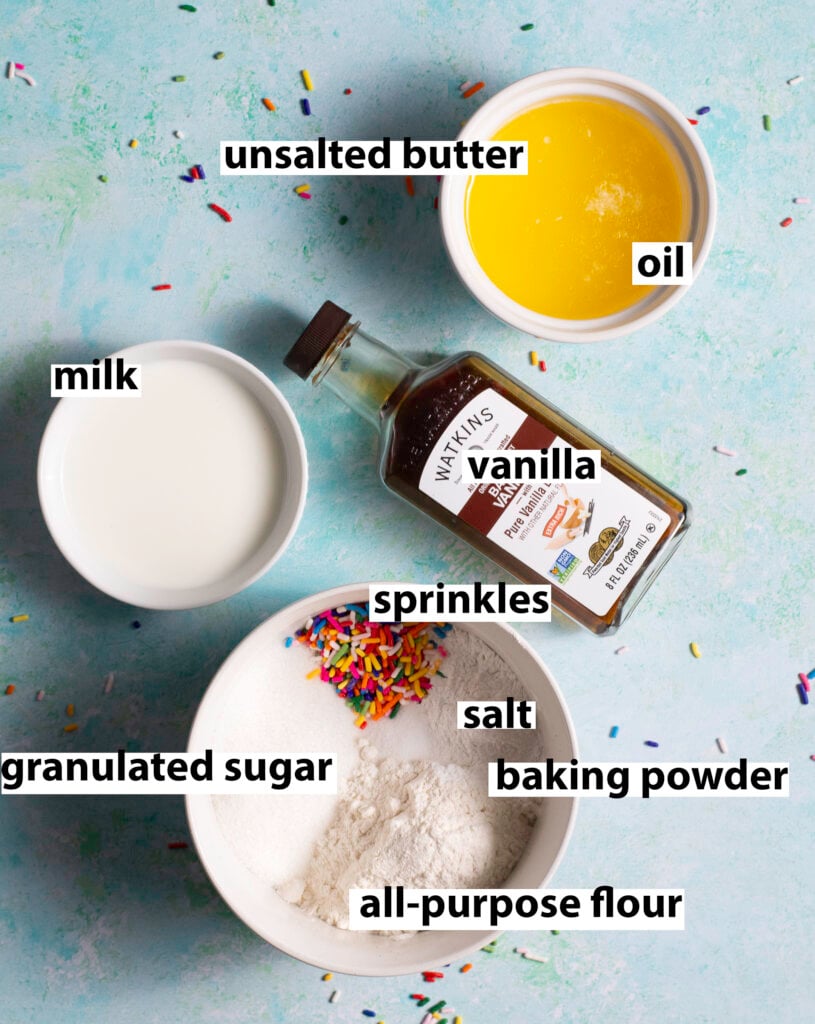
ingredients for the funfetti mug cake
- All-purpose flour
- Granulated sugar. Can't make a cake without sweetness!
- Double -acting baking powder. Leavening starts immediately and is further activated with heat - perfect for a fast "baking" time in the microwave
- Unsalted butter. Needed to amp up the flavor in a cake that would otherwise be bland.
- Oil. Balances the fat quality and makes sure that the cake is still soft when frozen.
- Sprinkles. Come on - it's funfetti!
- Vanilla. Subtle but needed kick of flavor.
- Salt. Brings out the flavor of the vanilla and butter.
tips
- Cover the mug cake immediately after removing from the microwave. This prevents steam (moisture) from leaving the cake and keep it soft and moist until ready to use. Not doing will likely result in the cake drying out drastically - seriously - you'll likely end up with a funfetti cake crouton!
- This recipe makes 2 quarts of this funfetti birthday cake ice cream. If your ice cream maker has a a smaller capacity you can churn in multiple batches but be sure to keep the unused custard base refrigerated during that time!
- Jimmies are the best option for this recipe since they do not bleed colors easily and take a little time dissolve. Quins are a close second since they also do not bleed easily but they can leave behind a slight texture (similar to undissolved jimmies).
Nonpareils are not recommended for this recipe since they bleed and start to dissolve almost on immediate contact with any moisture so instead of a confetti effect your ice cream will likely end up with one single color as a result of all the colors mixing. - If this is your first time making a custard you can use a thermometer to help cue you on when it's ready and avoid your mixture curdling. This custard is ready at 160°F and should never exceed 180°F as it will curdle past this temperature.
how to make the perfect funfetti Birthday Cake Ice cream
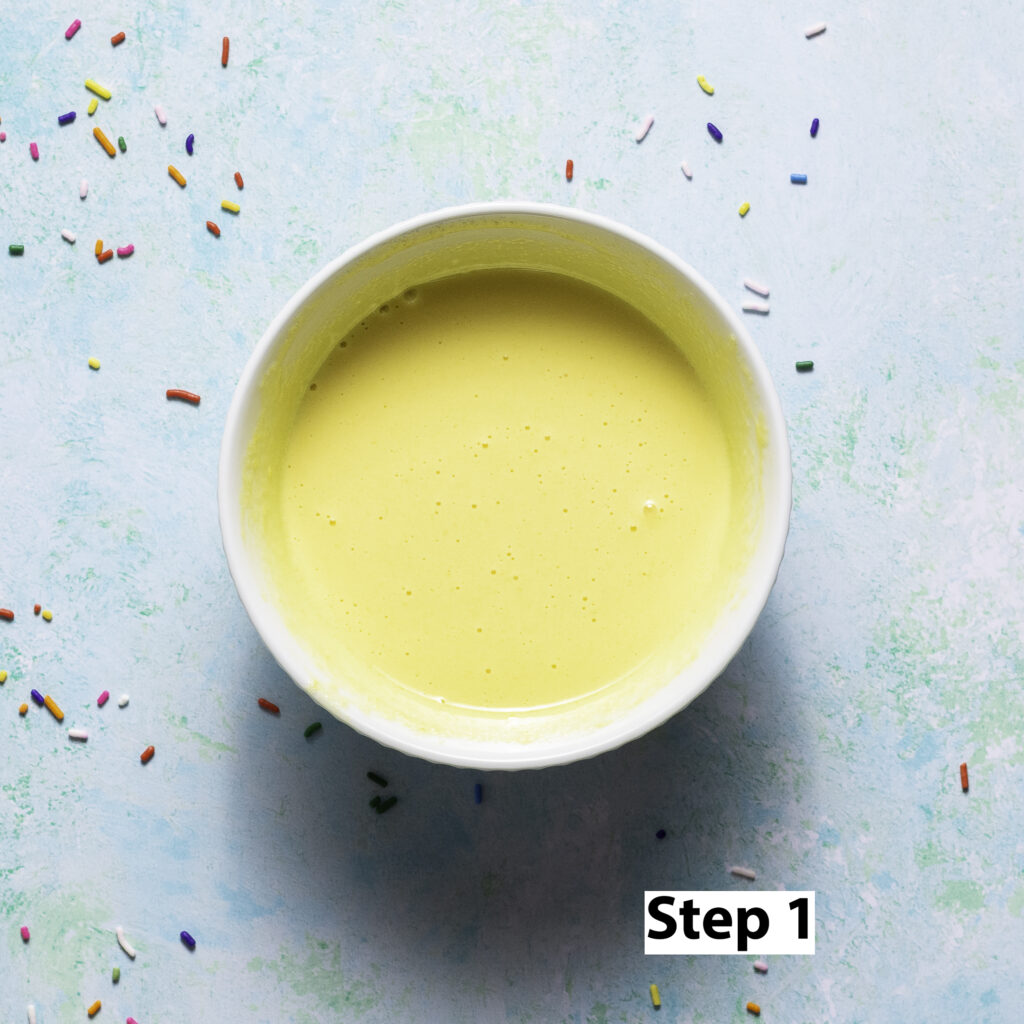
Step 1. Start by making the custard base for the ice cream. In a small mixing bowl add the egg yolks and ½ a cup of the granulated sugar. Whisk vigorously until the egg yolks are a pale yellow and the sugar is mostly dissolved. Set aside.
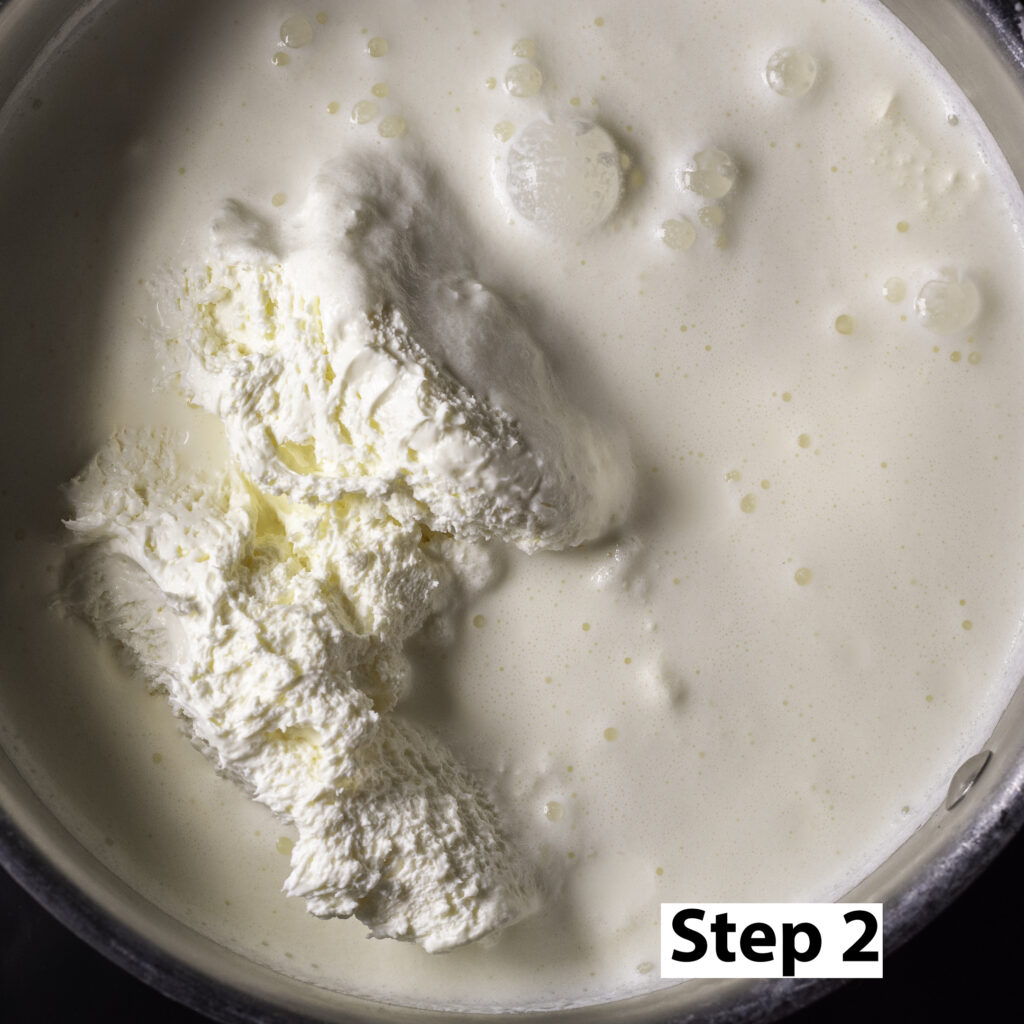
Step 2. In a medium saucepan add the rest of the granulated sugar, the milk, heavy cream, cream cheese & salt. Stir over medium heat until the mixture comes to a gentle simmer and the cream cheese is fully melted.
You may use an immersion blender at this step to blend cream cheese in and speed up the process.
Otherwise, use a mixing spatula, to gently press the cream cheese against the sides of the saucepan to help it blend in. Make sure to scrape the sides of the pan to continue to evenly incorporate the cream cheese.
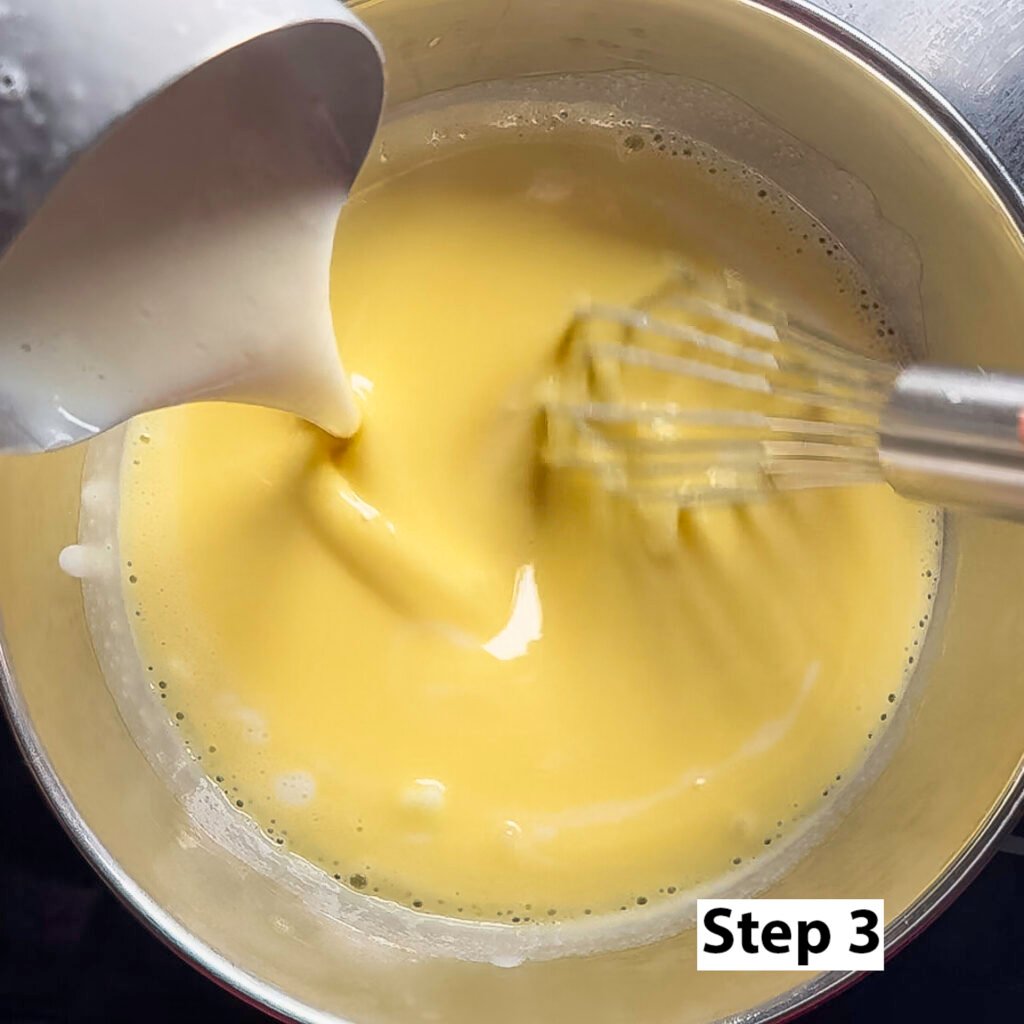
Step 3. Once the heavy cream mixture has come to a simmer temper the egg yolks from step 1 by adding a cup of the heavy cream mixture at a time. Make sure to continually whisk the egg yolks to avoid any hotspots that can cause the yolks to "scramble."
Repeat this until the entire heavy cream mixture is incorporated.
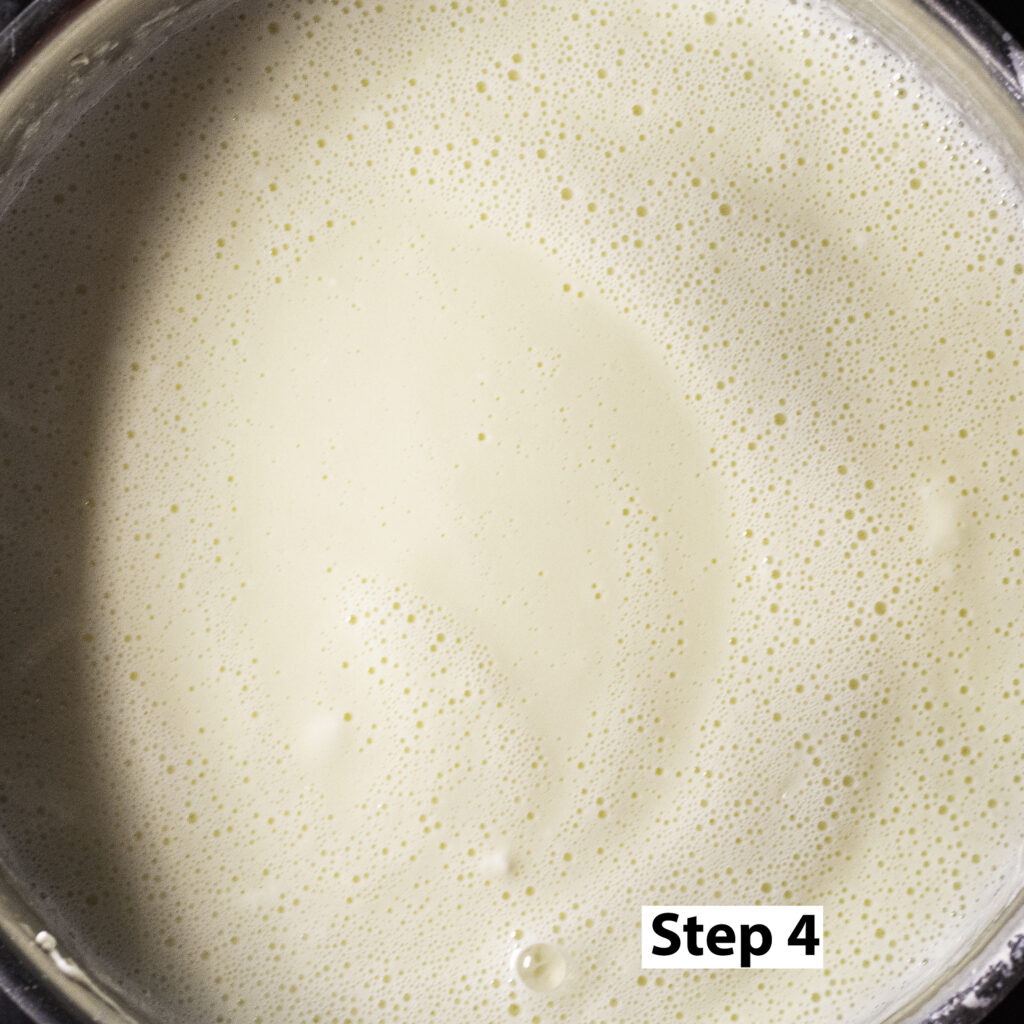
Step 4. Return the mixture to the saucepan and over low-medium heat, continue to stir until the mixture thickens and coats the back of a spoon/spatula. Be careful not to over heat the the custard at this point as the yolks can still scramble.
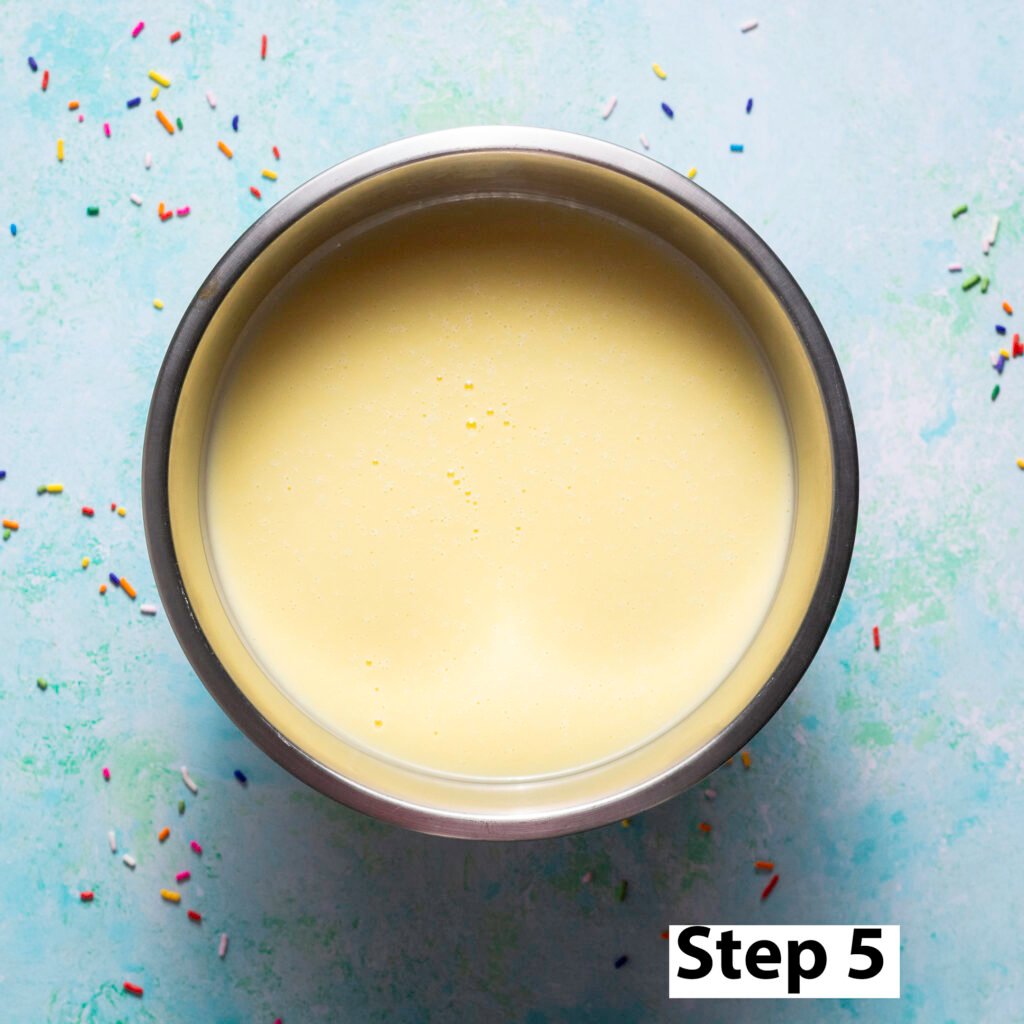
Step 5. Strain the finished custard through a fine mesh sieve into a large heat resistant bowl. Add the vanilla. There should not be any small, grainy-looking lumps as this is an indication that your custard likely curdled.
Step 6. Cover with the lid or plastic wrap then chill in the refrigerator for a minimum of 6 hours or up to 3 days before churning.
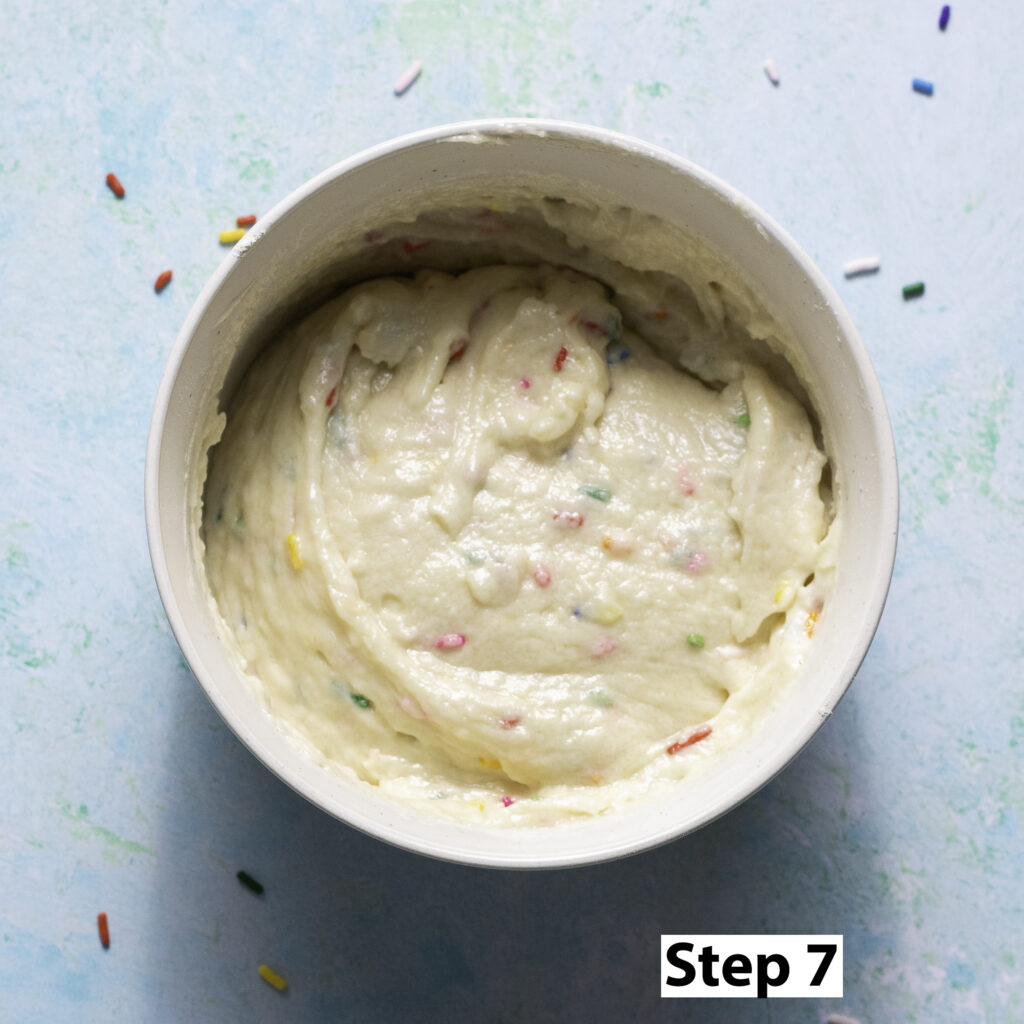
Step 7. While your custard base chills make the "mug cake" by adding all the ingredients to a large bowl and mix until smooth. The batter should only take up a third of the bowls total volume as it will expand during heating.
Step 8. Microwave for 2 minutes then immediately cover with an airtight lid or by pressing plastic wrap to the surface of the cake to stop moisture from leaving the cake via steam. You may also place the sealed cake in the freezer or refrigerator to speed up the cooling process.
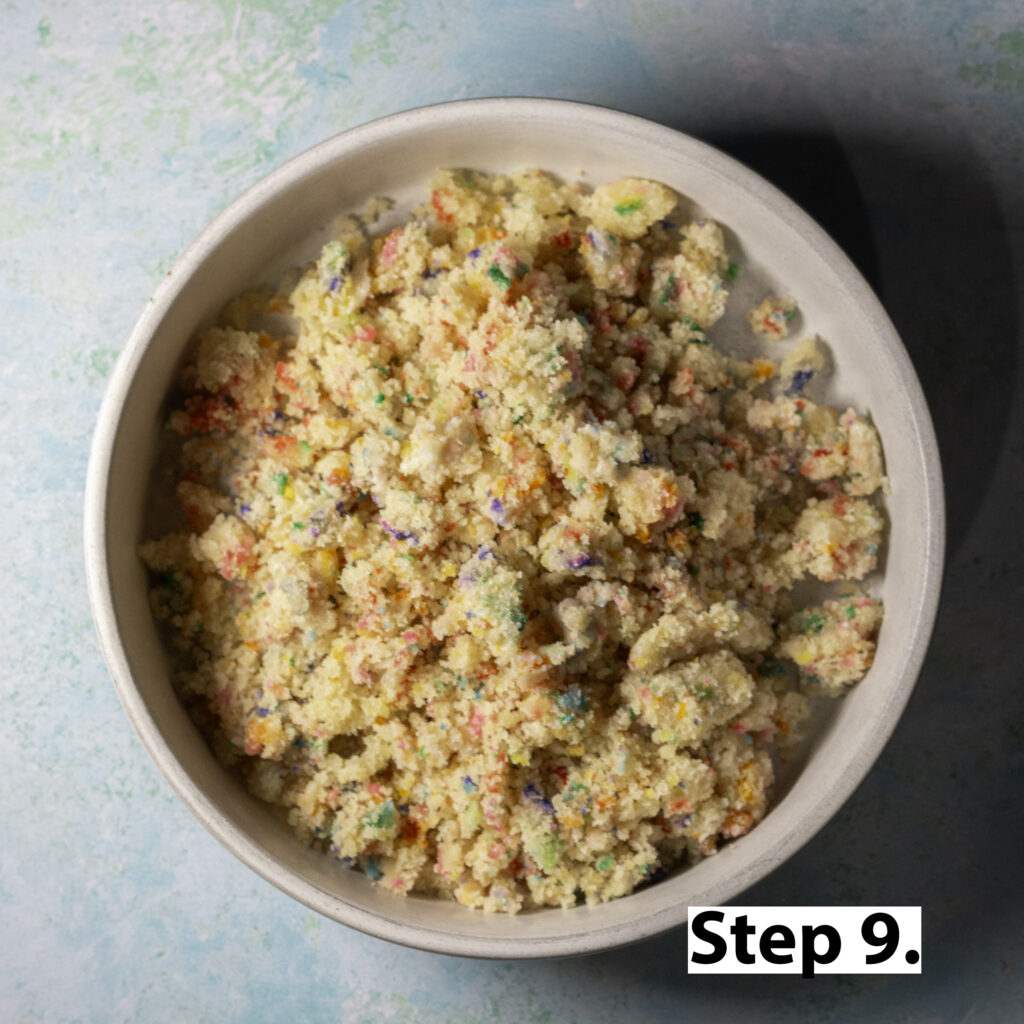
Step 9. Once the cake has completely cooled, crumble, cover and set aside for layering in the ice cream.
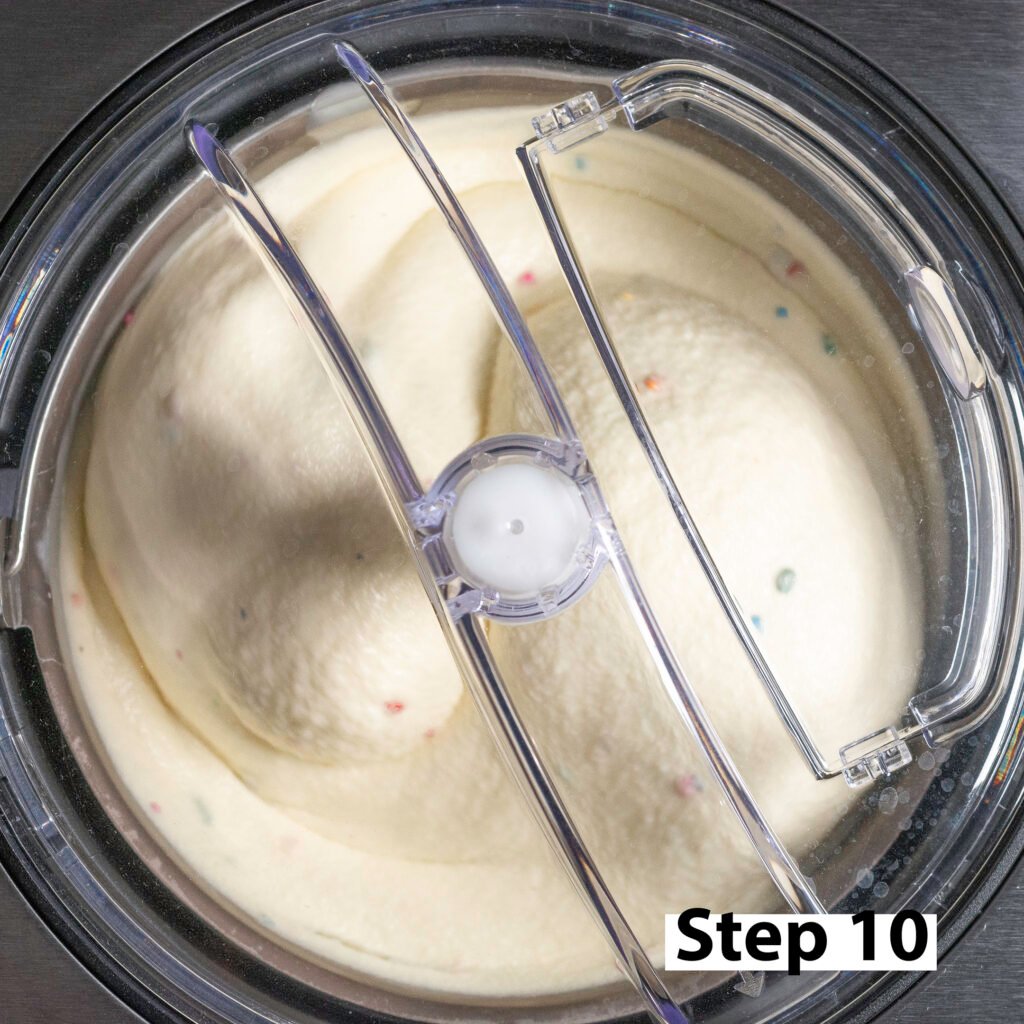
Step 10. Churn the ice cream according to your ice cream maker manufacturer's instructions. This ice cream took 38 minutes in my Whynter Ice Cream Maker.
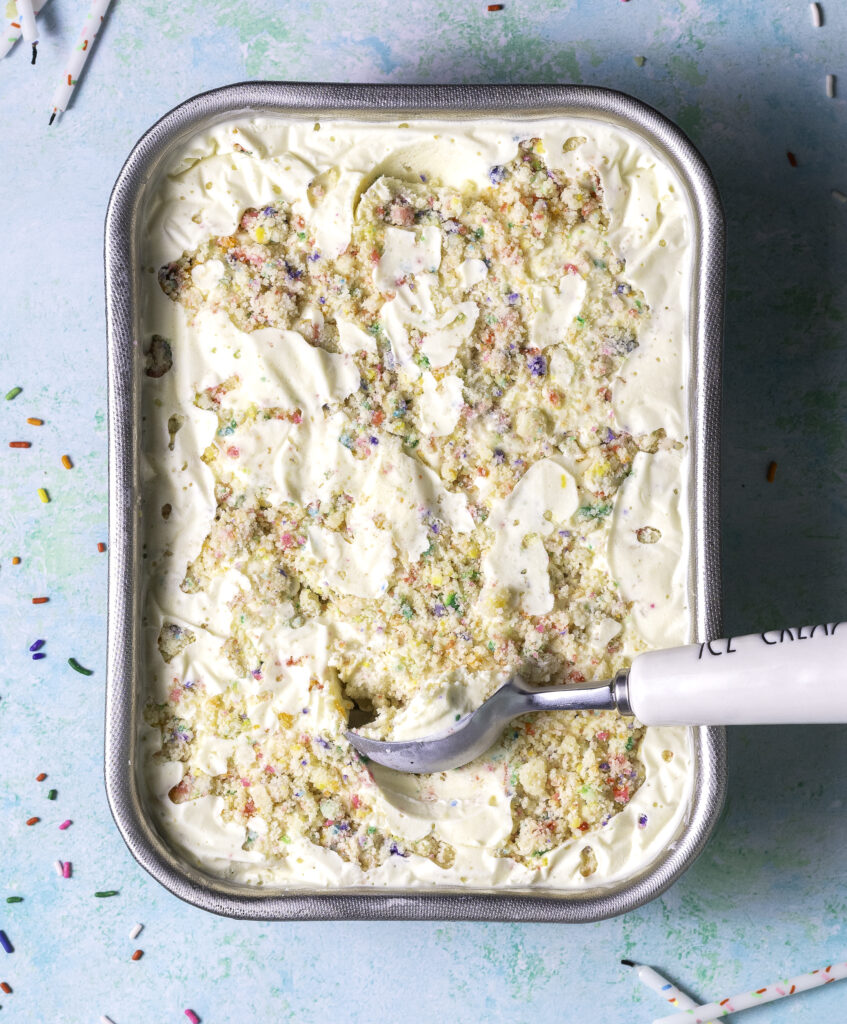
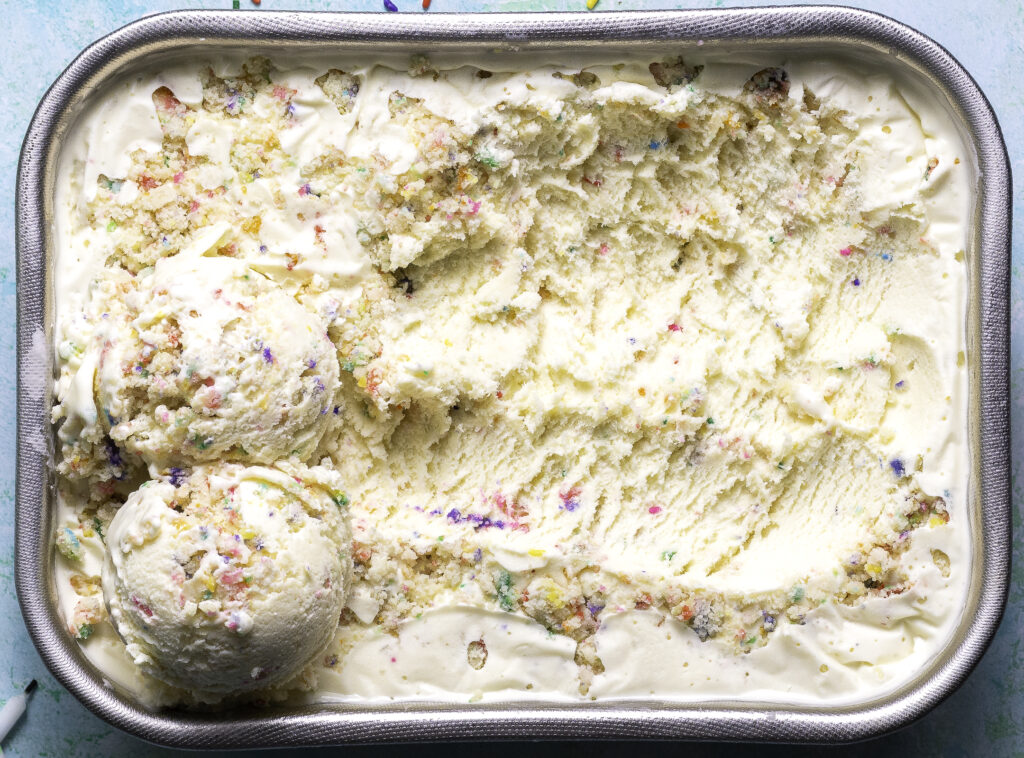
Step 11. Once the custard base has finished churning begin to layer the ice cream in your container of choice starting with a layer of ice cream then sprinkling crumbles of the confetti mug cake from the previous step.
.
Step 12. Repeat the layering process until all the ice cream & funfetti mug cake crumbles have been used then cover with a lid or plastic wrap and allow to set in the freezer undisturbed for a minimum of an hour before enjoying!
Funfetti Birthday Cake Ice Cream
Ingredients
Equipment
Method
- In a small medium mixing bowl add the egg yolks and ½ a cup of the granulated sugar. Whisk vigorously until the egg yolks are a pale yellow and the sugar is mostly dissolved. Set aside.
- In a medium sauce pan add the rest of the granulated sugar, the milk, heavy cream, cream cheese & salt. Stir over medium heat until the mixture comes to a gentle simmer and the cream cheese is fully melted. You may either use a mixing spatula, gently pressing the cream cheese against the sides of the saucepan to help it blend in or use an immersion blender.
- Once the heavy cream mixture has come to a simmer temper the egg yolks by adding a cup of the heavy cream mixture at a time while continually whisking to avoid any hotspots that can cause the yolks to "scramble."Repeat this until the entire heavy cream mixture is incorporated.
- Return the mixture to the saucepan and over low-medium heat, continue to stir until the mixture thickens and coats the back of a spoon/spatula. Be careful not to overheat the the custard at this point as the yolks can still scramble. The custard will be ready at 160°F.
- Strain the finished custard through a fine mesh sieve into a large heat resistant bowl. Add the vanilla then cover with lid or plastic wrap.
- Chill in the refrigerator for a minimum of 6 hours or up to 3 days before churning. Make your funfetti "mug" cake during this time.
- Add all the ingredients to a large bowl microwave-safe bowl and mix until smooth. The batter should only take up a third of the bowl's total volume as it will expand during heating.
- Microwave for 2 minutes then immediately cover with an airtight lid or by pressing plastic wrap to the surface of the cake to prevent it from drying out and becoming brittle.
- Once the cake has completely cooled, crumble and set aside in an airtight container or Ziploc bag until ready for layering.
- Churn the ice cream according to your ice cream maker manufacturer's instructions. This ice cream took 38 minutes in my Whynter Ice Cream Maker.
- Once the custard base has finished churning layer the ice cream in your container of choice starting with a layer of ice cream then sprinkling crumbles of the funfetti mug cake set aside earlier.
- Repeat the layering process until all the ice cream & the funfetti mug cake have been used then cover with a lid or plastic wrap and allow to set in the freezer undisturbed for a minimum of an hour before enjoying!