
Easy Homemade Pizza Dough for Beginners
If you've ever wanted to make your own pizza dough at home this easy homemade pizza dough recipe is the perfect place to start! Made with just a handful of basic ingredients you probably already have in your pantry, it's soft, just a little chewy without being doughy or tough, and bakes up with the crisp crust every pizza lover dreams of. It's honestly better than carry out and one of the best pizza dough recipes I've ever made.
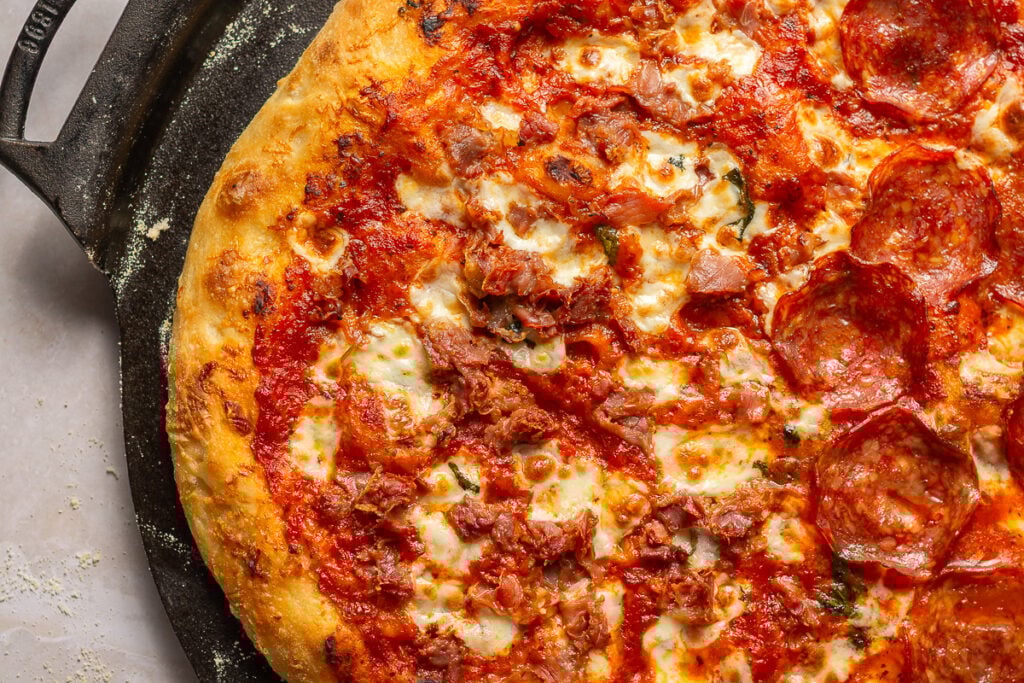
The pizza dough comes together without a mixer or dough hook attachment. Instead this pizza dough recipe uses the stretch-and-fold method keeping things beginner-friendly and giving the dough it's chewy crust. From there, you can turn it into a classic pizza night centerpiece topped with mozzarella cheese and marinara, or get creative with pesto, leftover Thanksgiving turkey, or whichever toppings you love most.
This easy pizza dough recipe is great to keep on hand since it's endlessly customizable and gives you restaurant-quality results at home. Looking to have more fun with doughs? Try this same-day cassava focaccia, these buttermilk biscuits or these sweet New Orleans-style beignets!
Key Ingredients
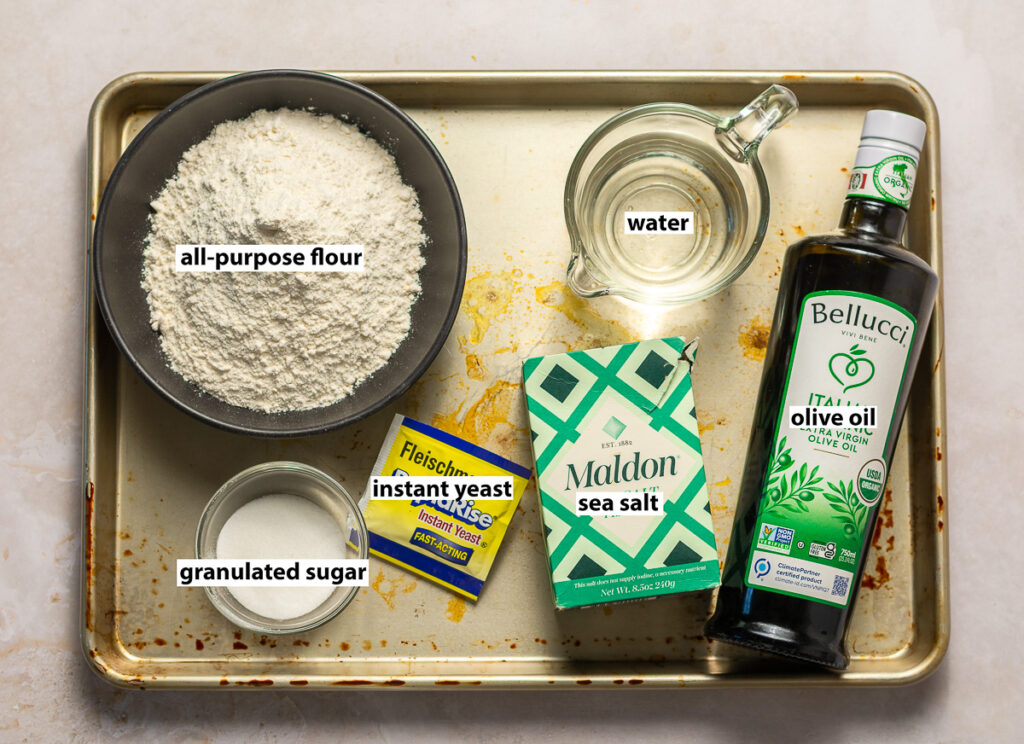
All-purpose flour. Used over bread flour to make this recipe more accessible since you probably already have it on hand. All-purpose flour will also yield a softer texture. Either bleached or whole wheat all-purpose flour will work. It has enough gluten to maintain a strong structure in the pizza dough. You can substitute the all-purpose flour for 00 pizza flour.
Sugar. Not used to sweeten the dough but to feed the the yeast for sufficient rise. I opt for granulated sugar but brown or maple sugar, honey or true maple syrup can be substituted.
Salt. Sea salt is used for flavor and is used moderately since it slows fermentation (the rising process). Avoid iodized salt as it can drastically inhibit fermentation. If preparing the dough for next-day use you can use additional salt (up to 1½ teaspoons to avoid over salting the dough).
Water. Hydrates the dough.
Olive oil. Used to flavor the pizza dough and also makes it softer and more pliable.
Tips for the Best Homemade Pizza Dough
If substituting the granulated sugar, use the same amount of brown or maple sugar. If you opt for a liquid sweetener like honey, agave or maple syrup, double the amount. For example, this recipe calls for ½ a teaspoon of granulated sugar so if you opt to use honey you'll need a teaspoon. Sugar substitutes like those that contain erythritol will not work since they do not contain any sugar.
Use a kitchen scale! This dough is a high-hydration dough - meaning it uses a higher ratio of water to flour resulting in a more open crumb aka more holes! Using a kitchen scale ensures precision in measurements so that the dough isn't too wet or soft or too firm.
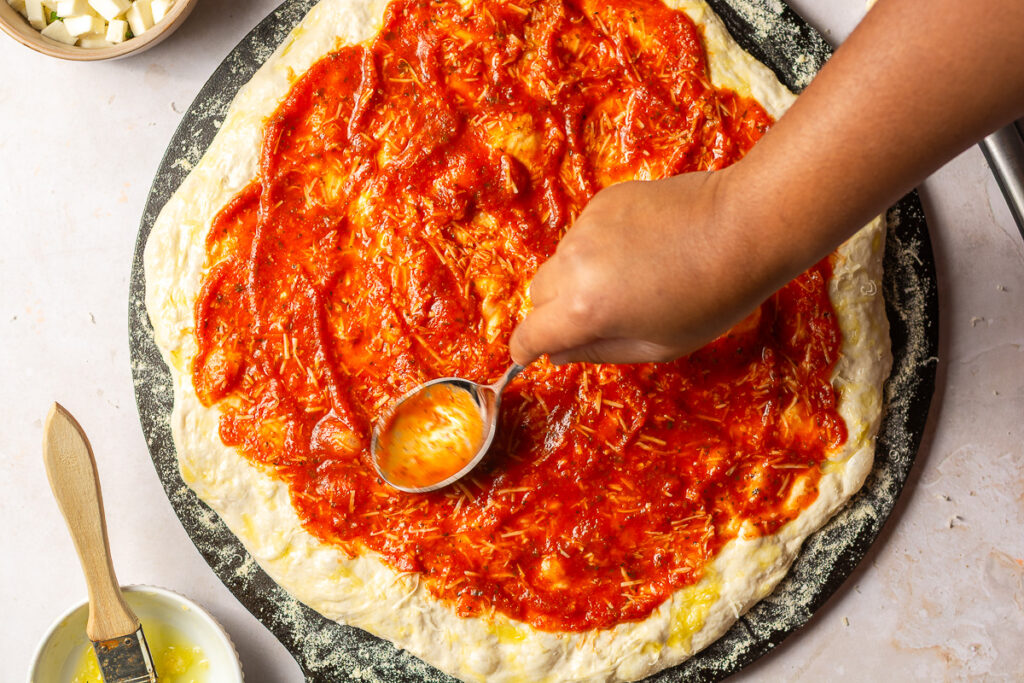
Add a generous layer of shredded parmesan cheese after brushing the dough with olive oil but before your sauce. The parmesan will prevent the sauce and the rest of the toppings from sliding off.
If using a pizza stone turn the ball of dough out on to a sheet of parchment paper dusted with a cornmeal-flour mixture. This makes transfer much easier and less technical.
Frequently Asked Questions
Can I use baking powder instead of yeast? No the power and mechanism of these leavening agents are completely different. Yeast works more slowly via the process of fermentation
Can I knead the dough instead doing a stretch & fold? A stretch and fold technique is less vigorous than kneading so it prevents the gluten strands from being overworked which would result in a dense, gummy-textured crumb. Stretch and folds also yield a bread with large air pockets giving a strong but softer and more chewy bread, more desirable for a pizza dough.
Second, stretch and folds are particularly efficient when dealing with high-hydration doughs like this one since kneading can be messy due to the stickiness of the dough.
Can I substitute active yeast for instant yeast? Yes, but there a few additional considerations. Firstly, active dry yeast has to be rehydrated before it can be used in a dough to rise. Be sure to follow the manufacturer's instructions for this as the liquid will have to be in a certain temperature range (usually 100-110°F ) for optimal results. Additionally, active dry yeast requires additional time for rising due its larger granules. Add an extra 15 minutes to first 2 rest times in between stretch and folds. For the final rest and rise add an extra 30 minutes.
Can I make this dough in advance for future use? Yes! Simply follow the instructions as usual up until after the last stretch and fold and then immediately refrigerate the dough in an airtight container. The dough will rise much more slowly at a cooler temperature so instead of a 2 hour final rise you would allow the dough to rise in the refrigerator for 8-12 hours.
Why didn't my homemade pizza dough rise?
Three things can affect the rise in yeasted doughs - the type of yeast, quality of the yeast & the ambient temperature of the dough's rising environment.
- Type of yeast: Instant yeast (used in this pizza dough recipe) works much faster than active dry yeast and also doesn't require blooming. Active dry yeast on the other hand needs extra time to rise. If using active dry yeast instead of instead of instant add an extra 15 minutes to the first 2 rest periods and an extra 30 minutes to the final rest. This ensures that the pizza dough has enough time to adequately rise.
- Quality of the yeast: Expired yeast will not perform sufficiently to give an adequate rise. If you are unable to confirm the expiration date of your yeast or you're unsure of how long it has been open you can test your yeast. To test yeast dissolve half a teaspoon of sugar in a ¼ cup of warm water (100-110°F ) then add 1 teaspoon of yeast. The mixture should foam/bubble after 10-15 minutes indicating that the yeast is good to use.
- Ambient temperature: The best place for the pizza dough to rest is any warm spot in your kitchen. A warmer temperature accelerates the fermentation process that occurs with the yeast, helping with the rise. If you're like me and the ambient temperature in your home is quite cool, you will need to create an optimal space for the dough. My go to is usually either the inside the oven (switched off) with the light on or with a bowl of warm water next to the proofing dough.
How to Make this Easy Homemade Pizza Dough
Step 1. Add all the dry ingredients (the all-purpose flour, instant yeast, sugar & sea salt) to a large bowl and stir to evenly distribute
Step 2. Make a well in the center of the dry ingredients and add the water & the olive oil.
Step 3. Using a spatula, mix until the dough just comes together. It will be lumpy and sticky. This is fine. Cover with plastic wrap or a lid and allow to rest in a relatively warm place for 30 minutes. Resting the dough for this homemade pizza is very important since it's a high-hydration dough. Resting allows the gluten to relax so that the dough is more pliable and easier to shape.
Stretch & Fold the Pizza Dough
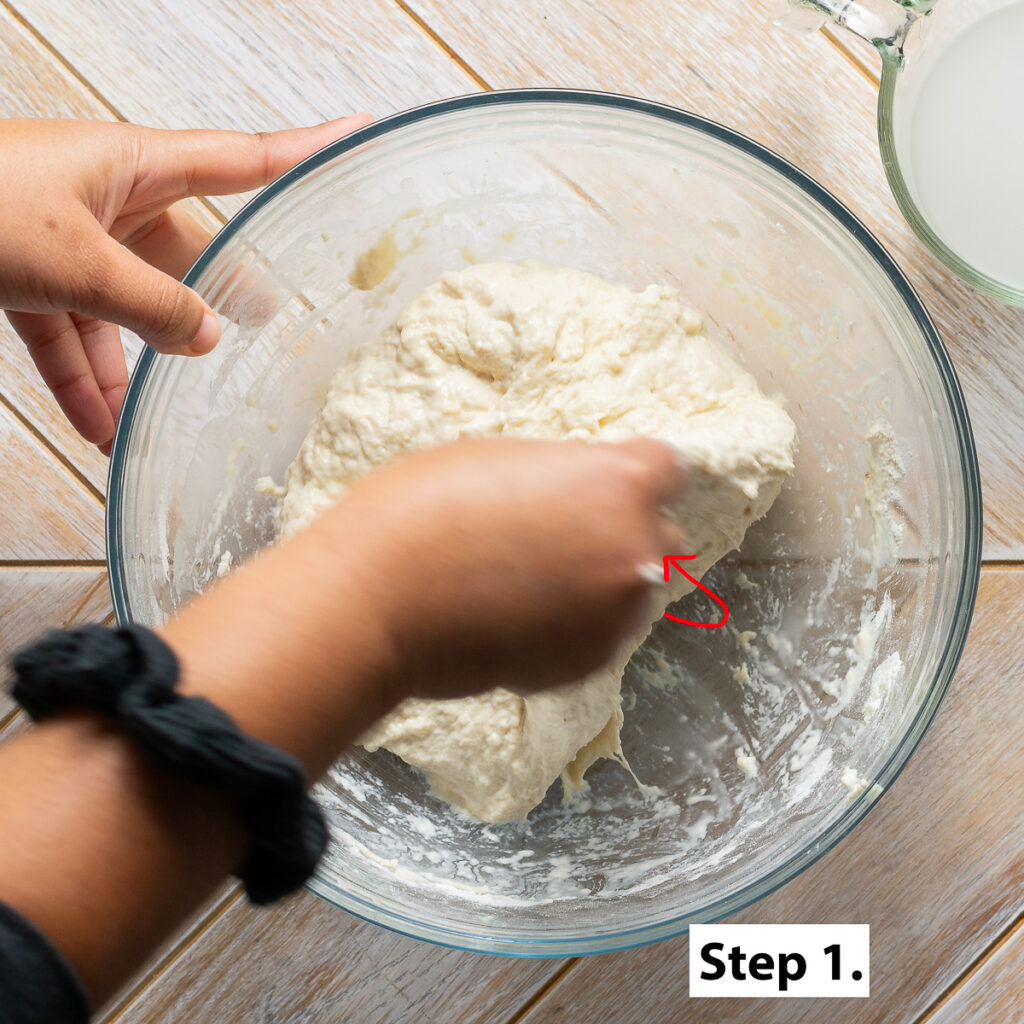
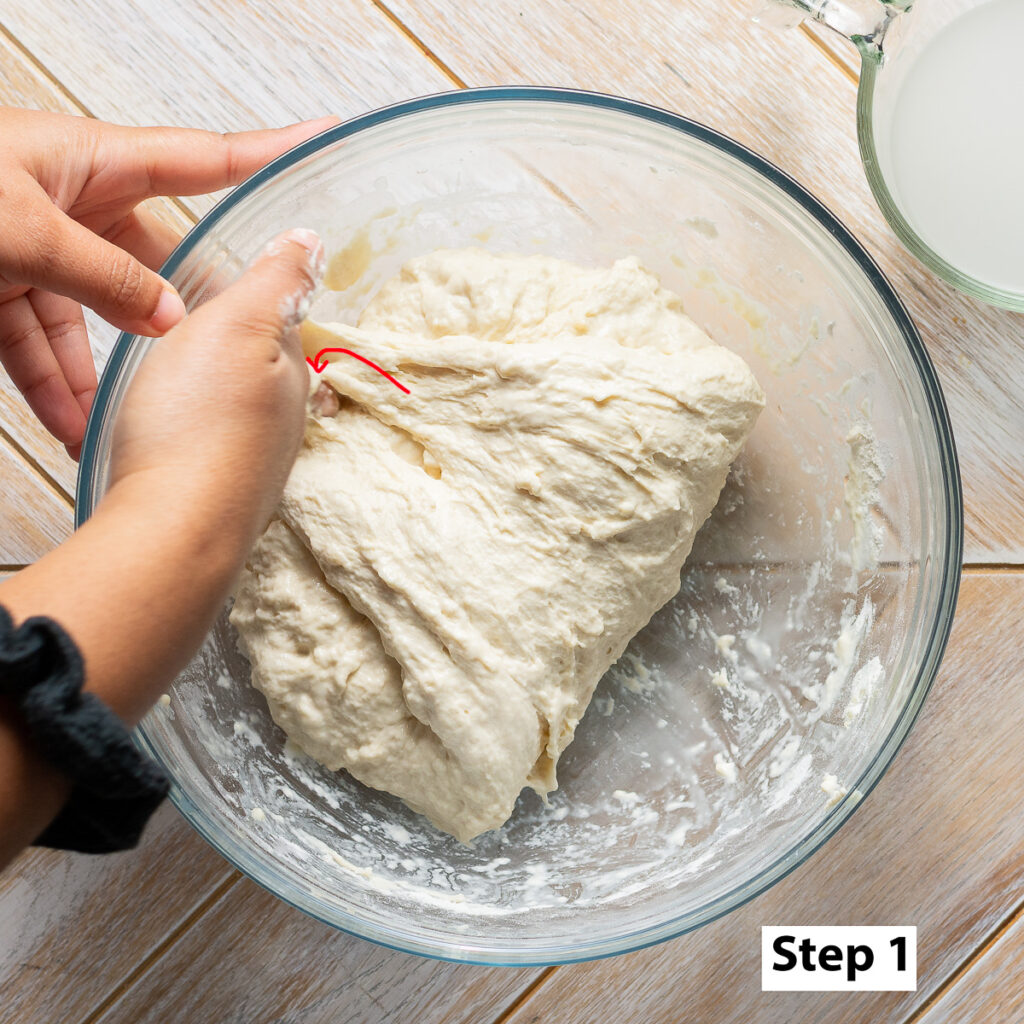
Step 1. After allowing the dough to rest, complete the first stretch and fold. Wet your hand with room temperature water before handling the dough, keeping a bowl of water on hand as needed. This will help prevent the dough from sticking to your hands as you complete the stretch and folds.
Reach under the dough, pinching it between your thumb and other 4 fingers to pull it upward, stretching it in the process. Pull it across, tucking it into the other side directly across from where the dough was pulled.
Repeat this 4-6 more times pulling from different sections of the dough until the dough begins to form into a ball.
Step 2. Cover the pizza dough and allow it to rest for 30 minutes in a warm area. I typically proof doughs in my oven (switched off) with a bowl of hot water next to it.
Step 3. Repeat the stretch and fold process a second time allowing the dough to rest covered for another 30 minutes after the second fold.
Step 4. Complete a third stretch & fold and allow it to rest & rise covered for 2 hours. If preparing the pizza dough to use the next day immediately cover the dough tightly with plastic wrap or preferably a lid on an airtight container and refrigerate for up to 12 hours before use.
Baking the Pizza Dough Without a Pizza Stone
Step 1. Preheat the oven to 425°F.
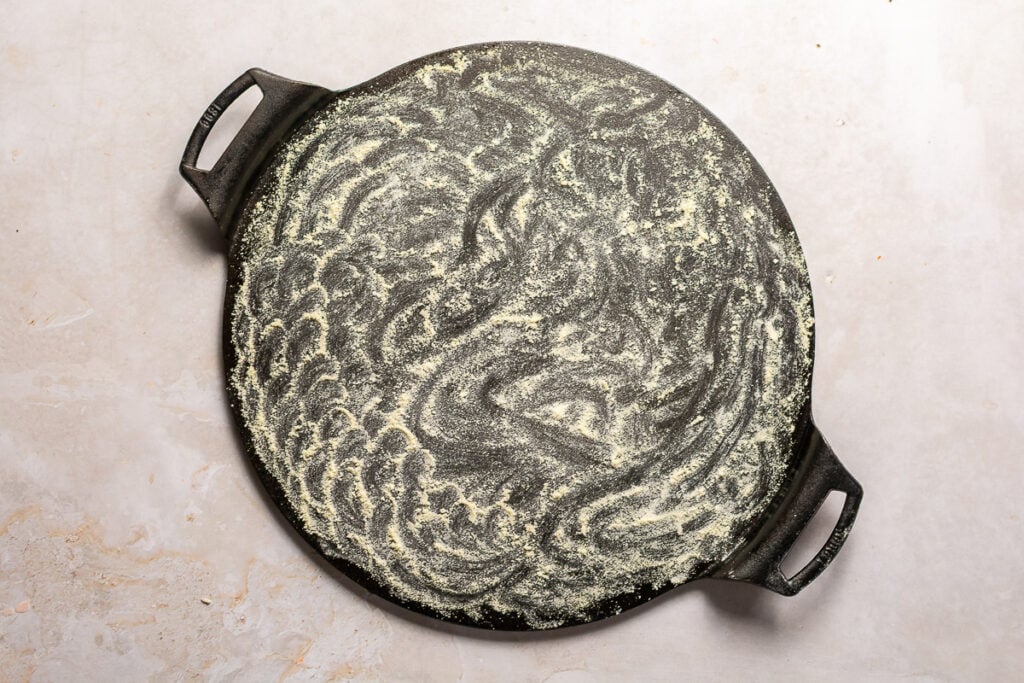
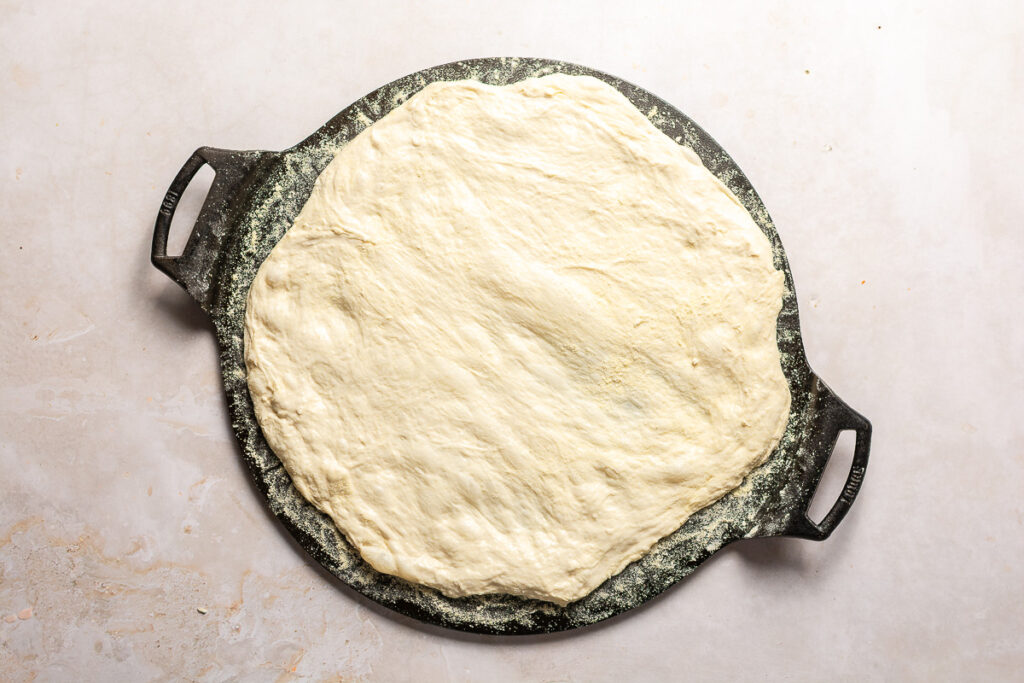
Step 2. Dust a heavy pan liberally with equal parts cornmeal and flour and turn out the risen dough onto the pan. A heavy pan such as cast iron heats up more quickly and retains heat more efficiently allowing you to get a nice crust on the underside of the pizza. The dough is more likely to stick to a lightly floured surface, especially as it is stretched.
Step 3. Using your hands, pull the dough, stretching and shaping it into a circle. For a thinner crust stretch the dough to about 14 inches. If you prefer a thicker crust stretch the dough to about a 12-inch circle. Avoid using a rolling pin to shape or flatten the dough as this will also eliminate the bubble which is what gives this pizza dough its airy texture.
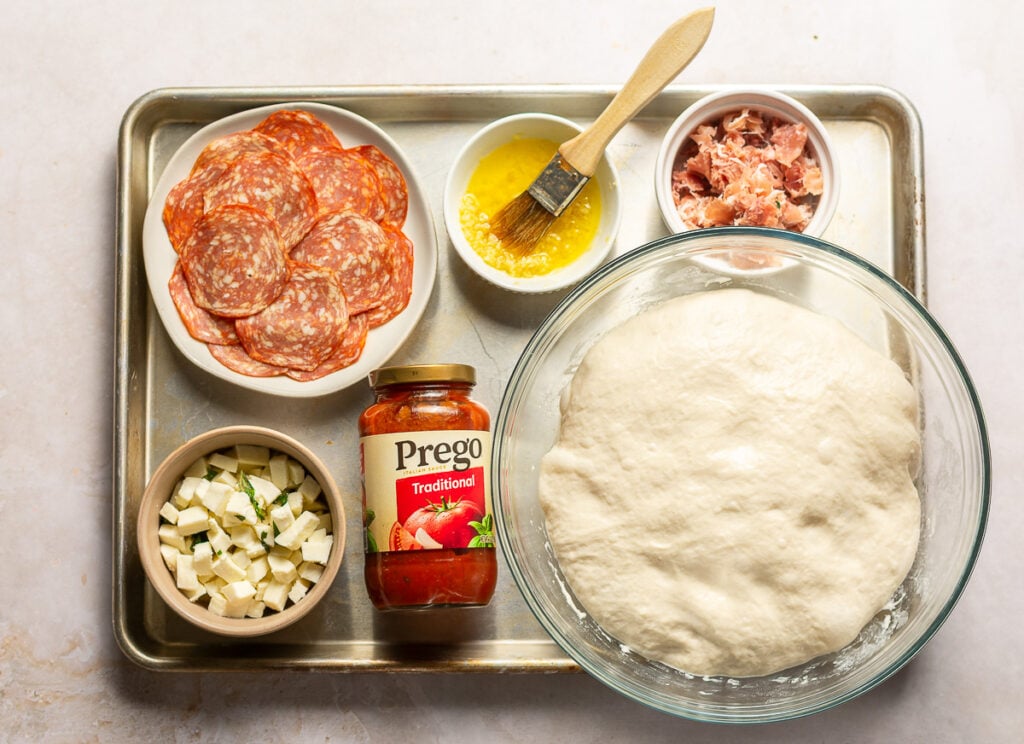
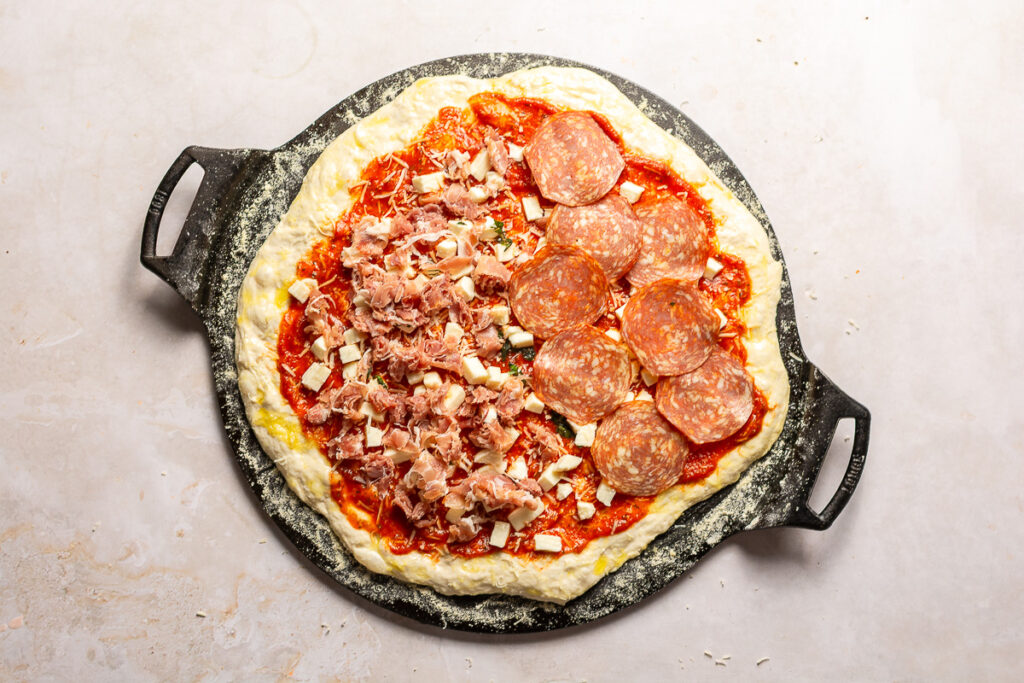
Step 4. Add the toppings of your choice, making sure to include a generous layer of parmesan cheese before the sauce to help prevent the toppings from sliding off.
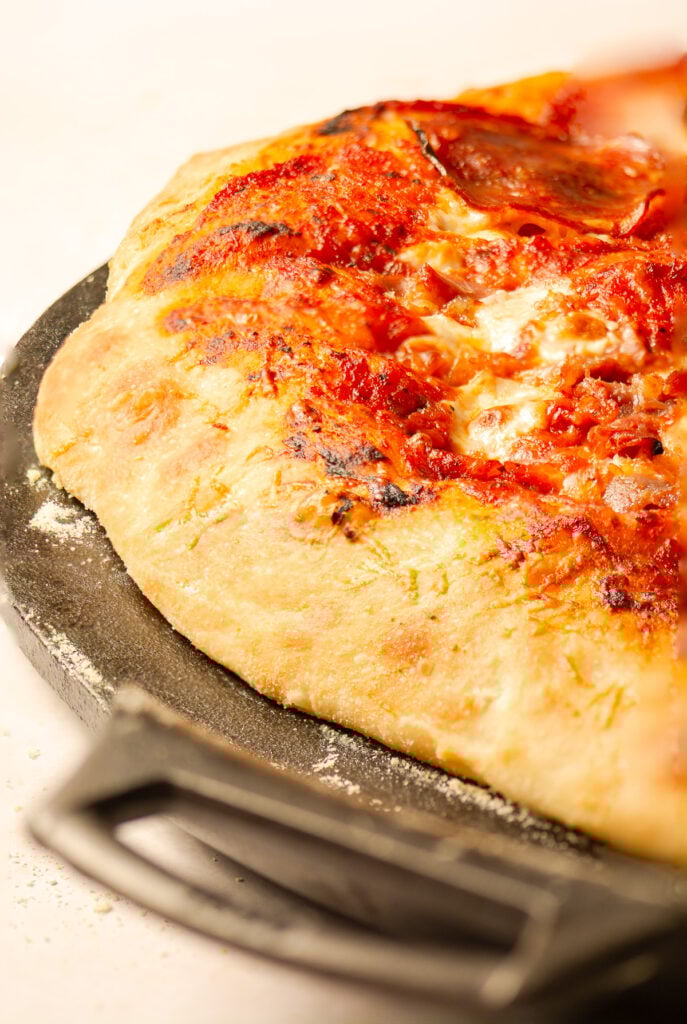
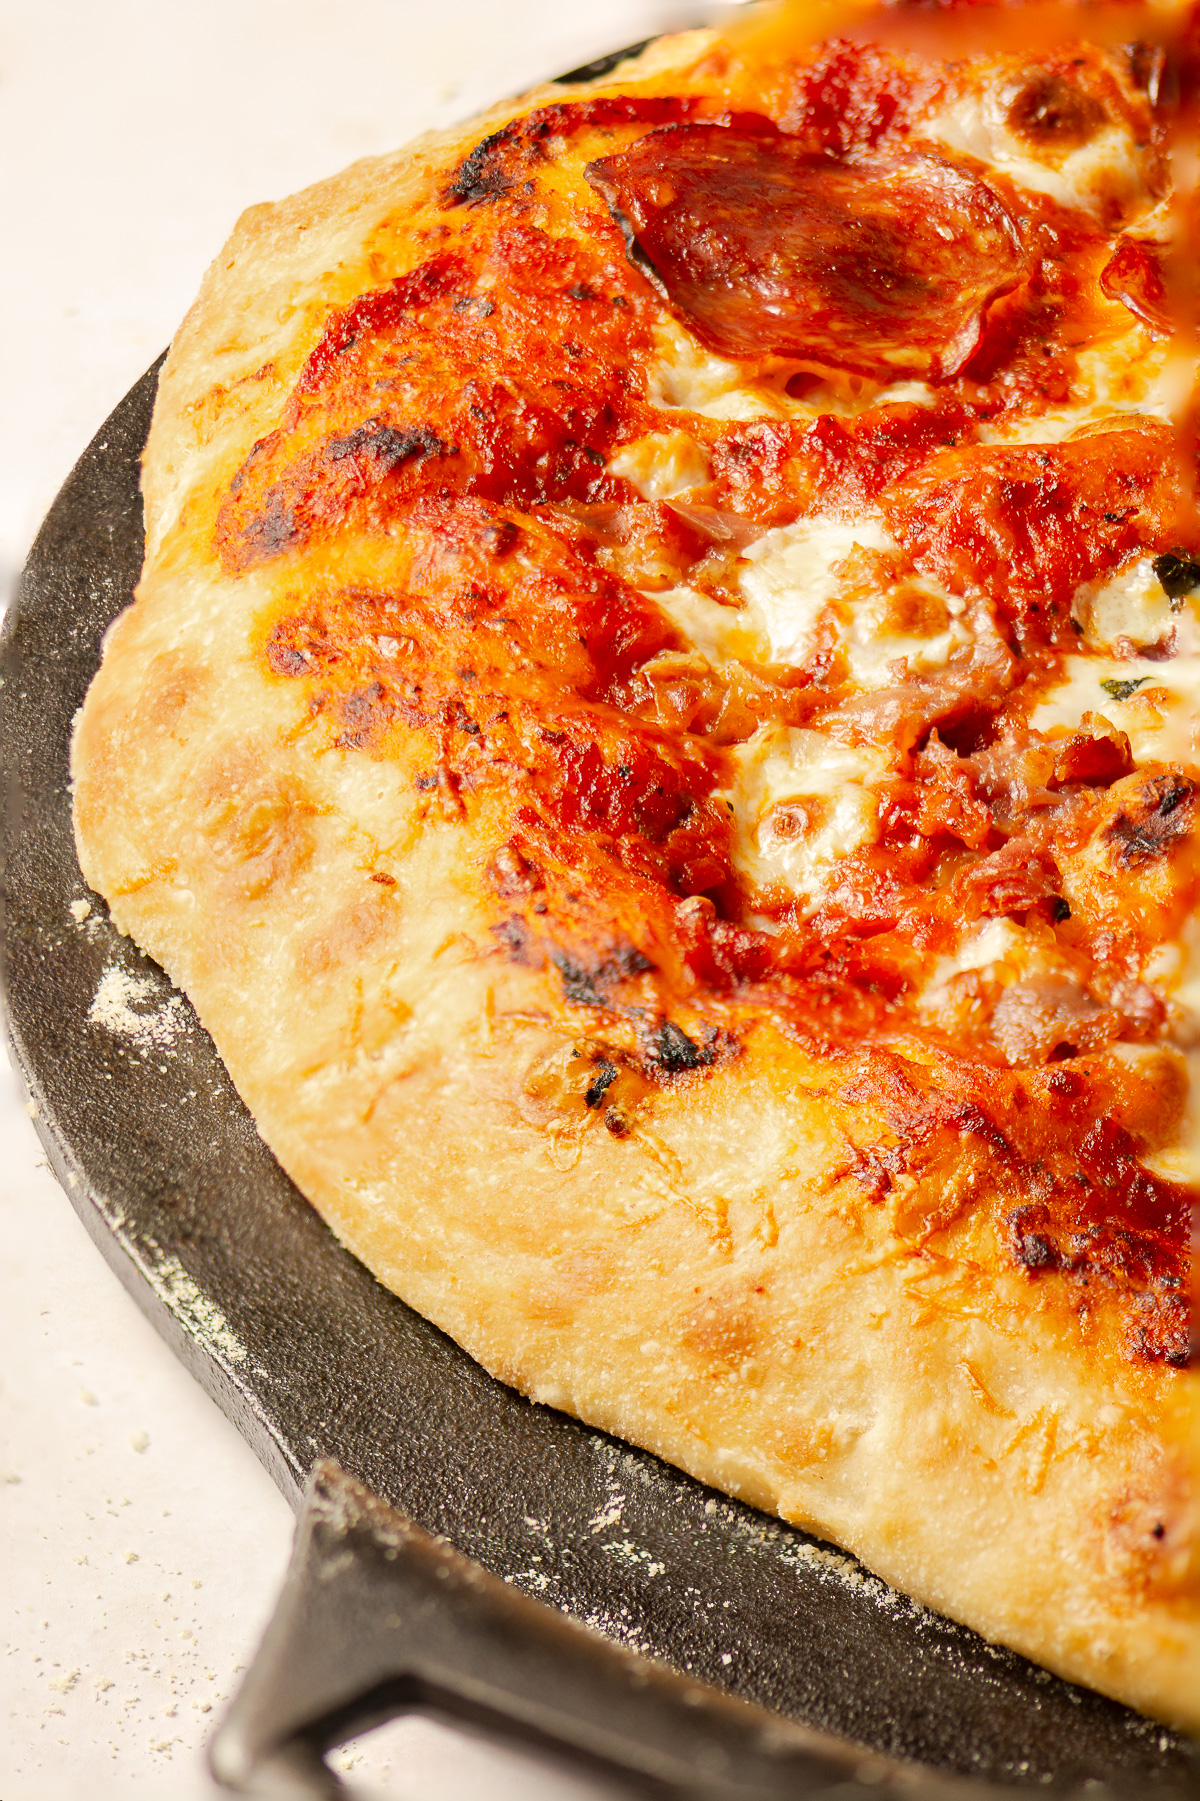
Step 5. Bake on the middle rack for 15-30 minutes until the edges are golden brown with a couple blistered dark brown spots.
Baking the Pizza Dough With a Pizza Stone
Step 1. Preheat the pizza stone in the oven for 40 minutes at 475°F. Preheating the pizza stone helps to ensure that the pizza cooks from the bottom and the top to avoid a dough underdone pizza dough.
Step 2. Once the dough has completely risen turn the dough ball out onto a surface dusted with equal parts cornmeal and flour. The dough will appear stringy and may stick to the bowl. This is fine, just use a dough scraper to get it all off from the sides of the bowl.
The dough is more likely to stick to a lightly floured surface, especially as it is stretched and makes transfer to the preheated pizza stone much more difficult. Cornmeal helps take away from the chalky flavor and texture you would get by just using flour. The bigger granules also helps the dough transfer more easily.
Step 3. Using your hands, pull the dough, stretching and shaping it into a circle. For a thin crust stretch the dough to about 14 inches. If you prefer a thicker crust stretch the dough to about a 12-inch circle. Avoid using a rolling pin to shape or flatten the dough as this will also eliminate the bubble which is what gives this pizza dough its airy texture.
Step 4. Add your favorite pizza toppings, including a generous layer of parmesan cheese before the sauce to help prevent the toppings from sliding off.
Step 5. Using a pizza peel, transfer the assembled pizza to the preheated pizza stone in the oven and bake for 10-20 minutes until the edges are golden brown with a couple blistered dark brown spots.
Easy Homemade Pizza Dough for Beginners
Ingredients
Equipment
Method
- Add all the dry ingredients (the all-purpose flour, instant yeast, sugar & sea salt) to a large bowl and stir to evenly distribute.
- Make a well in the center of the dry ingredients and add the water & the olive oil.
- Using a spatula, mix until the dough just comes together. It will be lumpy and sticky. This is fine. Cover with plastic wrap or a lid and allow to rest in a relatively warm place for 30 minutes. I usually opt for my oven (switched off) with a bowl of hot water next to it.
- After allowing the dough to rest, complete the first stretch and fold. Wet your hand with room temperature water before handling the dough to keep the dough from sticking to your hands. Reach under the dough, pinching it between your thumb and other 4 fingers to pull it upward, stretching it in the process. Pull it across, tucking it into the other side directly across from where the dough was pulled. Repeat this 4-6 more times pulling from different sections of the dough until the dough begins to form into a ball.
- Cover the pizza dough and allow it to rest again for 30 minutes in a warm area.
- Repeat the stretch and fold process a second time allowing the dough to rest covered for another 30 minutes after the second fold.
- Complete a third stretch & fold and allow it to rest & rise covered for 2 hours. If preparing the pizza dough to use the next day immediately cover the dough tightly with plastic wrap or preferably a lid on an airtight container and refrigerate for up to 12 hours before use.
- Preheat the oven to 425°F.
- Dust a heavy pan liberally with equal parts cornmeal and flour and turn out the risen dough onto the pan. The dough will appear stringy and may stick to the bowl. This is fine, just use a dough scraper to get it all off from the sides of the bowl.
- Using your hands, pull the dough, stretching and shaping it into a circle. For a thinner crust, stretch the dough to about 14 inches. If you prefer a thicker crust, stretch the dough to about a 12-inch circle. Avoid using a rolling pin to shape or flatten the dough as this will also eliminate the bubbles which is what gives this pizza dough its airy crumb.
- Add the toppings of your choice.
- Bake on the middle rack for 15-30 minutes until the edges are golden brown with a couple blistered dark brown spots.
- Preheat the pizza stone in the oven for 40 minutes at 475°F.
- Once the dough has completely risen turn the dough ball out onto a flat surface dusted with equal parts cornmeal and flour. The dough will appear stringy and may stick to the bowl. This is fine, just use a dough scraper to get it all off from the sides of the bowl.
- Using your hands, pull the dough, stretching and shaping it into a circle. For a thin crust, stretch the dough to about 14 inches. For a thicker crust, stretch the dough to about a 12-inch circle.
- Add your toppings as desired.
- Using a pizza peel, transfer the assembled pizza to the preheated pizza stone in the oven and bake for 10-20 minutes until the edges are golden brown with a couple blistered dark brown spots.
Notes
- If substituting the granulated sugar, use the same amount of brown or maple sugar. If using a liquid sweetener like honey, agave or maple syrup, double the amount. Sugar substitutes like those that contain erythritol will not work since they do not contain any sugar.
- Use a kitchen scale to ensure precision in measurements so that the dough isn't too wet or soft or too firm.
- Add a generous layer of shredded parmesan cheese after brushing the dough with olive oil but before your sauce. The parmesan will prevent the sauce and the rest of the toppings from sliding off.
- If it's your first time using a pizza stone turn the ball of dough out on to a sheet of parchment paper dusted with a cornmeal-flour mixture. This makes transfer much easier and less technical.
Love this recipe?
Tag @TheStushKitchen on instagram!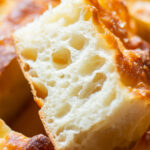


This was my first time making pizza dough from scratch. This recipe is easy to follow and gave a really nice crust!