
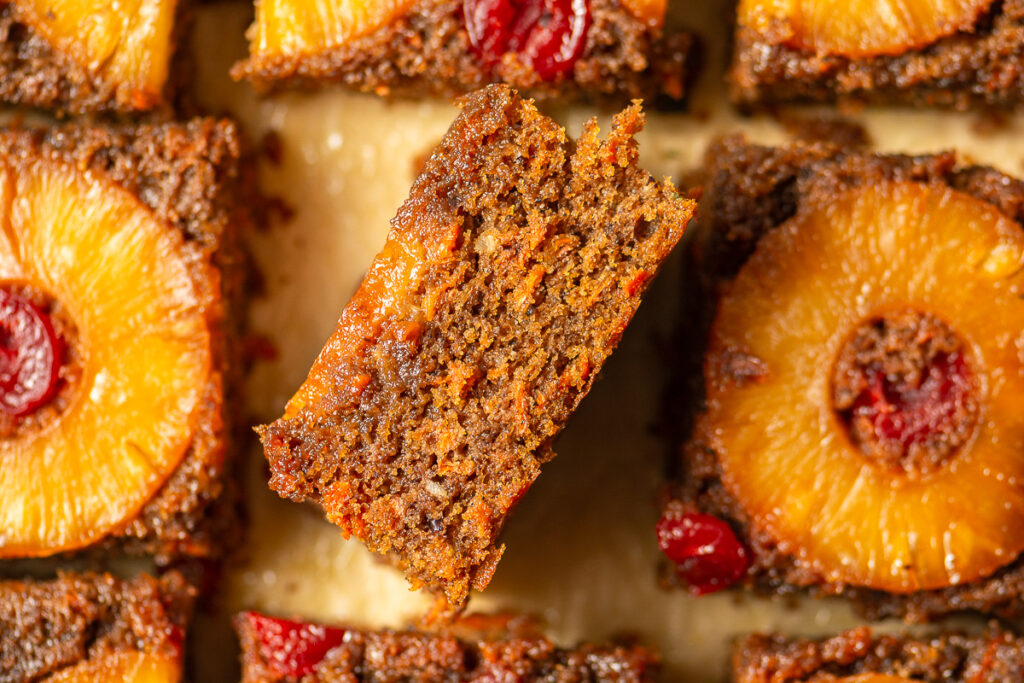
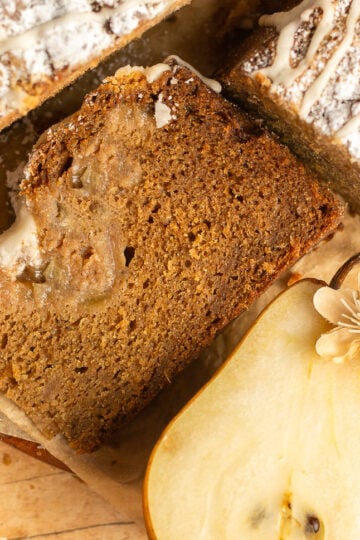
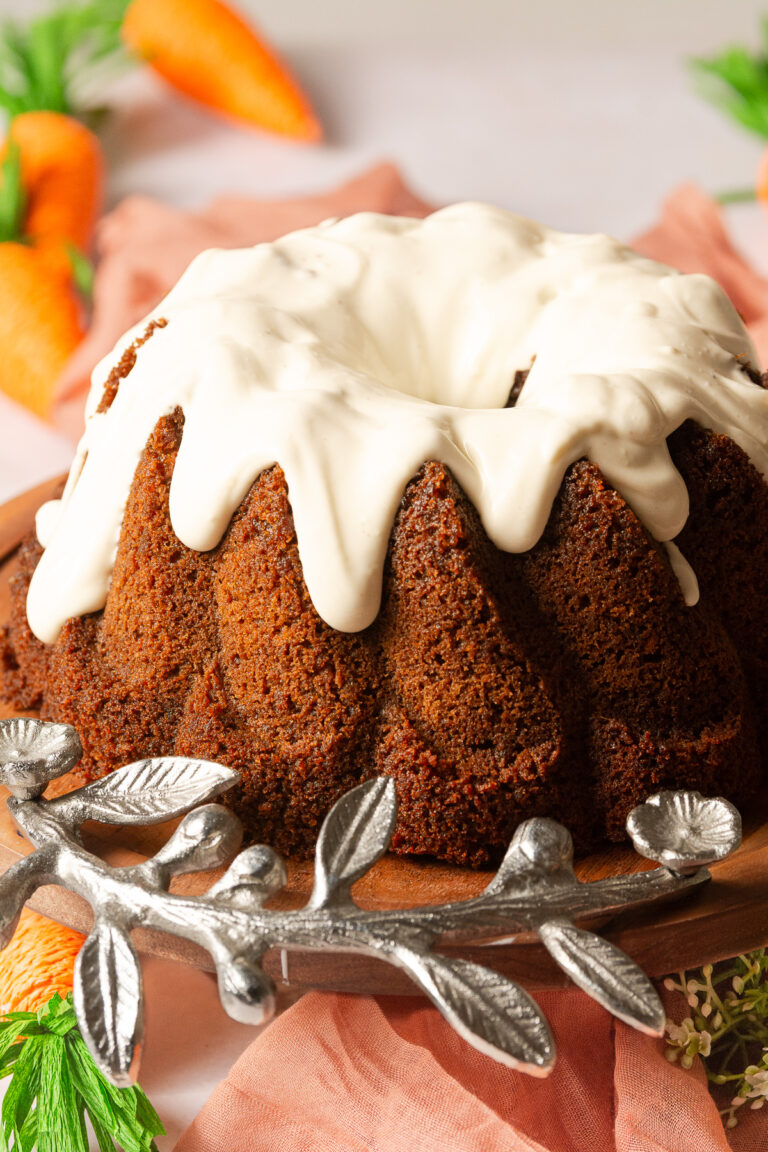
Pineapple Upside-Down Carrot Cake
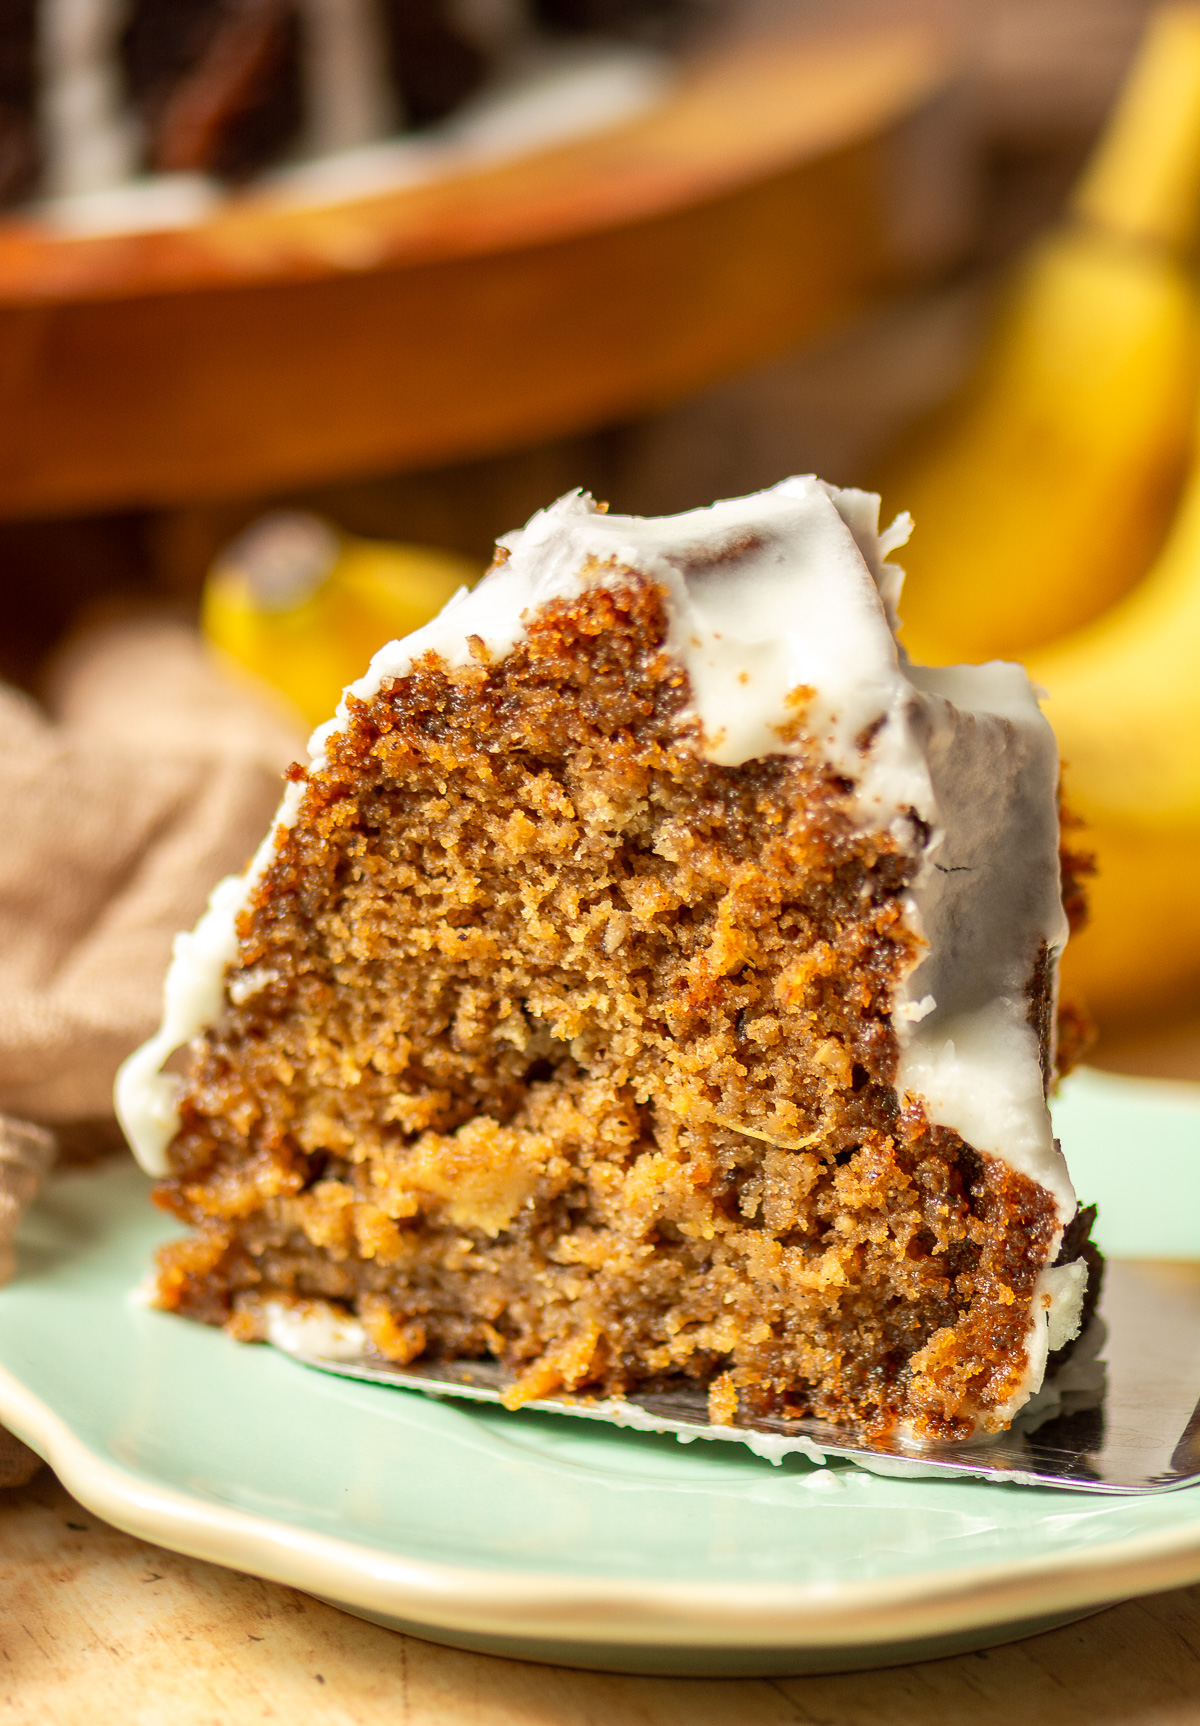
This pineapple upside-down carrot cake is the ultimate mash-up of two classics : moist carrot cake and fruity pineapple upside-down cake! Perfectly spiced with cinnamon, allspice, nutmeg & cardamom, this pineapple upside down cake is perfect for a crowd at any season so serve it up for Thanksgiving dessert or even easter!
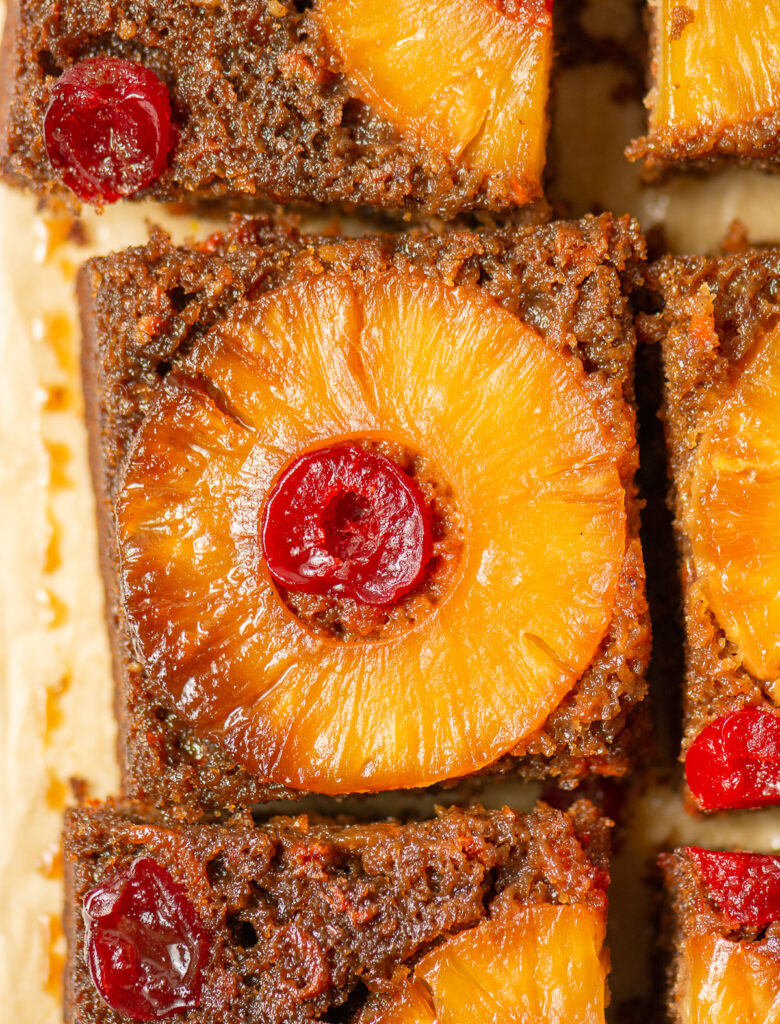
Baked in a cast iron skillet for a deep, golden caramelization, this recipe is an easy pineapple upside-down carrot cake is perfect for the baker looking for an impressive dessert that doesn't require the fuss of a layer cake!
If layer cakes are more your style check out this carrot layer cake filled with pecan butterscotch or this hummingbird cake!
Key Ingredients
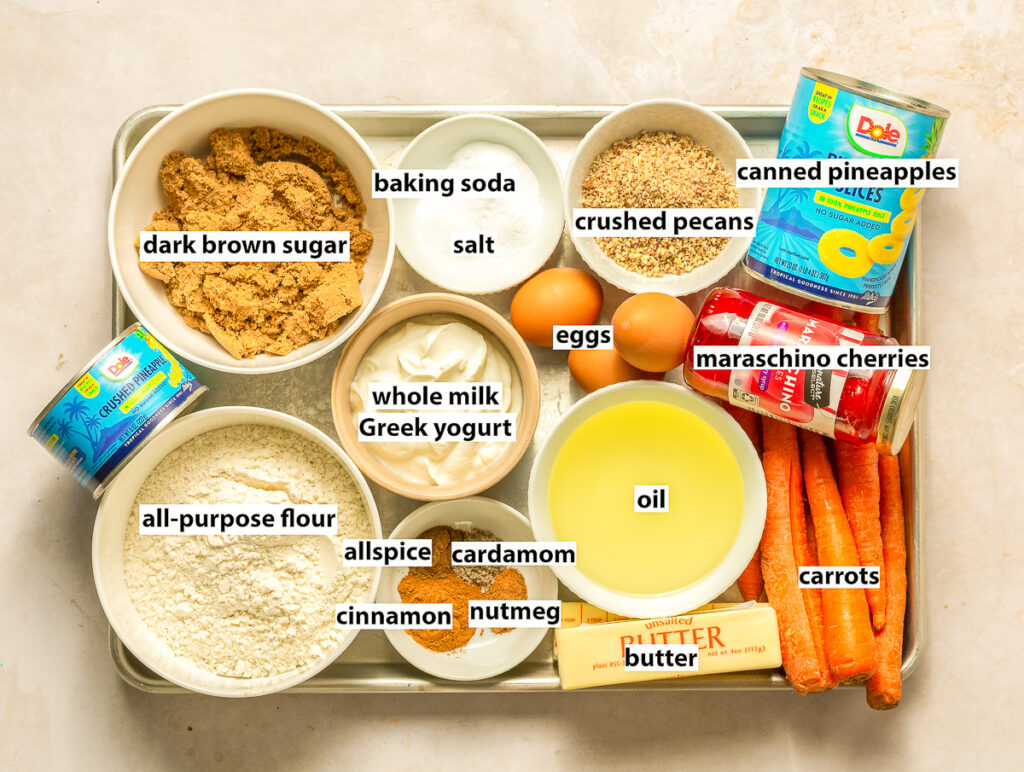
Carrots. Whole carrots are grated then roasted to get rid of excess water while concentrating the carrot flavor and caramelizing the natural sugars.
Spices and extracts. Vanilla extract, cinnamon, allspice, nutmeg & cardamom.
Pineapples & maraschino cherries. Use pineapple rings for a classic pineapple upside-down cake look. I prefer canned pineapple since they tend to be sweeter. Maraschino cherries help to contrast the slightly tart flavor of the pineapples as well.
Dark brown sugar. Deepens the flavors of the carrot cake and complements the spices making this cake a perfect spring or easter dessert but also amazing for fall. The brown sugar is also packed in the bottom of the baking dish and melts into a caramel ask the pineapple upside-down cake bakes.
Unsalted butter. Added in the carrot cake batter to boost flavor. Also melts with the brown sugar in the baking pan to make the caramel at the bottom of the pan.
All-purpose flour. Has enough gluten to hold the cake together with all the mix-ins.
Eggs. Add flavor & tenderizes the cake texture like in cakes but also importantly functions as a binder to support the mix-ins in the carrot cake batter.
Whole-milk greek yogurt. Adds more fat to the carrot cake batter for a tender cake.
Neutral oil. Oil is a liquid at room temperature so it gives the cake a softer texture especially if you opt to refrigerate your pineapple upside-down cake. Use a vegetable oil like canola for a neutral flavor.
Pecans. These are an optional mix-in for the carrot cake. I prefer to finely crush my pecans to avoid a cake that feels like eating around an obstacle course.
Tips for the Best Pineapple Upside-Down Carrot Cake
Use a dark, heavy pan. I love using cast iron for upside-down cakes since they conduct and retain heat extremely well. This gives a deeper caramelization on the pineapples and avoids a mushy layer of fruits
Use an oven thermometer. Ovens can run hotter or cooler than the presented reading or have hotspots. Using an oven thermometer takes out the guess work to ensure optimal results.
Don't skip roasting the carrots! This is an important step since its help to concentrate the carrot flavor while potentiating the natural sweetness.
How to Prepare the Pan for the Pineapple Upside-Down Carrot Cake
Step 1. On the stovetop, melt the butter in the baking dish over medium heat. Remove from the heat then spread the melted butter around to cover the bottom of the pan. Using your finger spread a little of the melted butter along the sides of the pan as well.
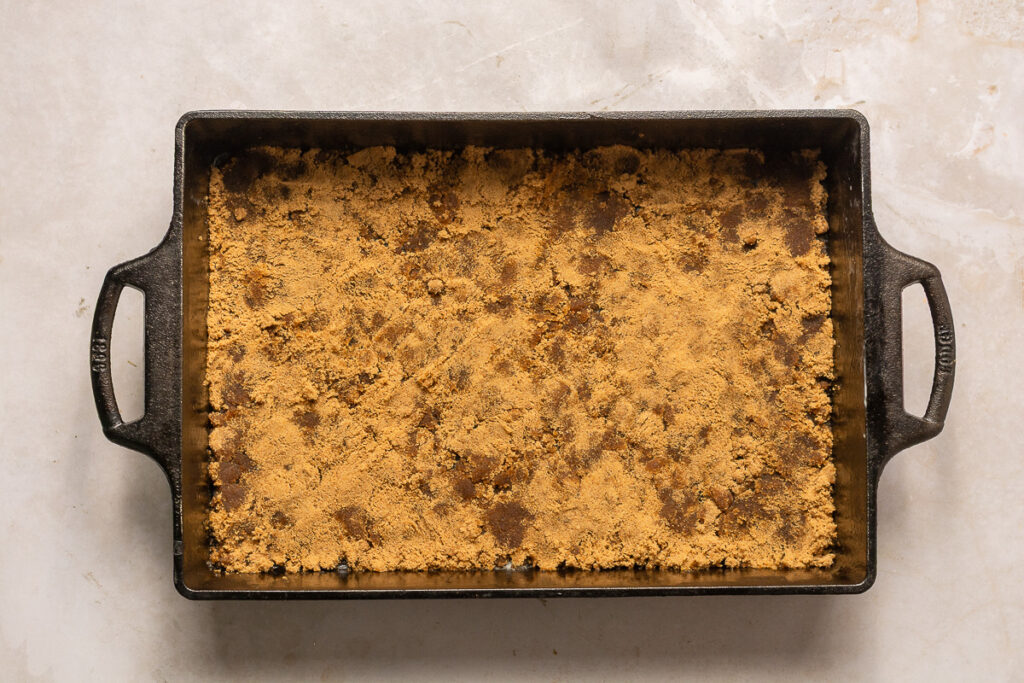
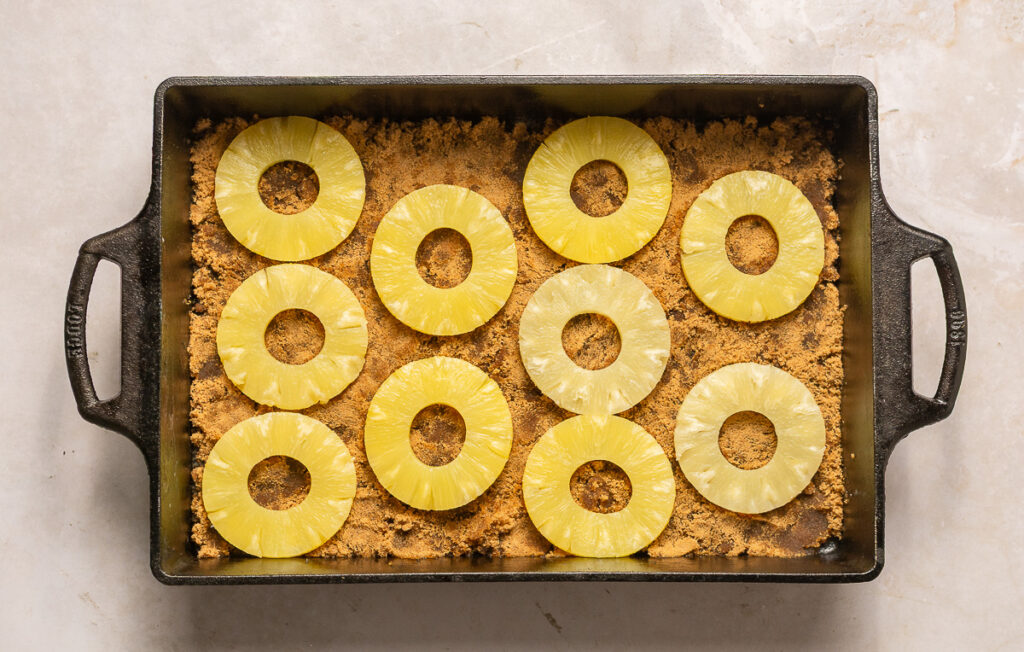
Step 2. Spread the dark brown sugar across the bottom of the pan, using your hands to press it in.
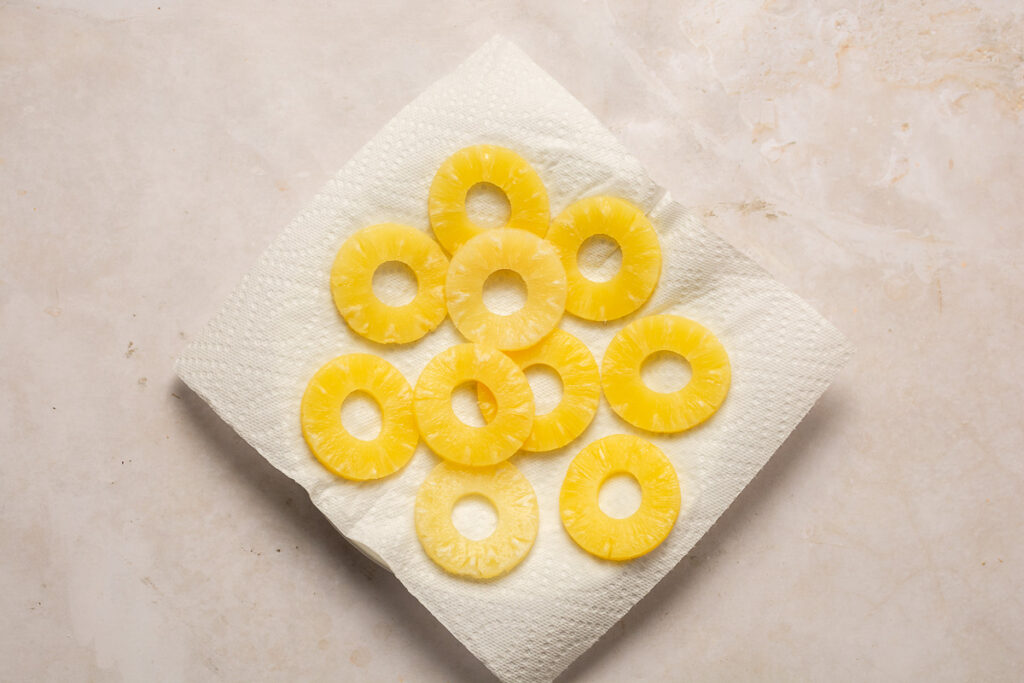
Step 3. Drain the pineapple slices well then place them on a plate lined with paper towels. Press gently to expel any excess pineapple juice. Moisture is the enemy of caramelization so getting out the excess pineapple juice will ensure a beautifully caramelized pineapple upside-down cake.
The pineapple juice won't be incorporated in the cake but don't throw it out! You can add them to homemade juices like this chamomile iced tea or even make a simple syrup like the one used in this hummingbird layer cake.
Step 4. Arrange the pineapple slices evenly in a single layer on top of the packed brown sugar.
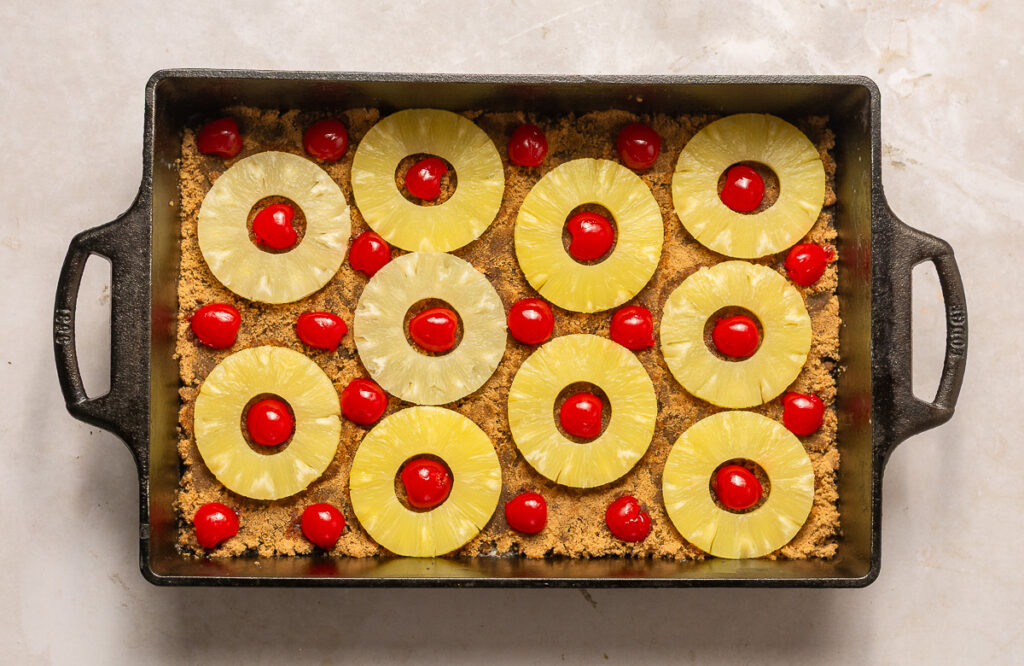
Step 5. Halve the maraschino cherries and place one half each in the center of the pineapple slices and to fill in any other gaps as desired. Set the pan aside until the cake batter is ready.
How to Make the Carrot Cake
Step 1. Pre-heat oven to 400 °F.
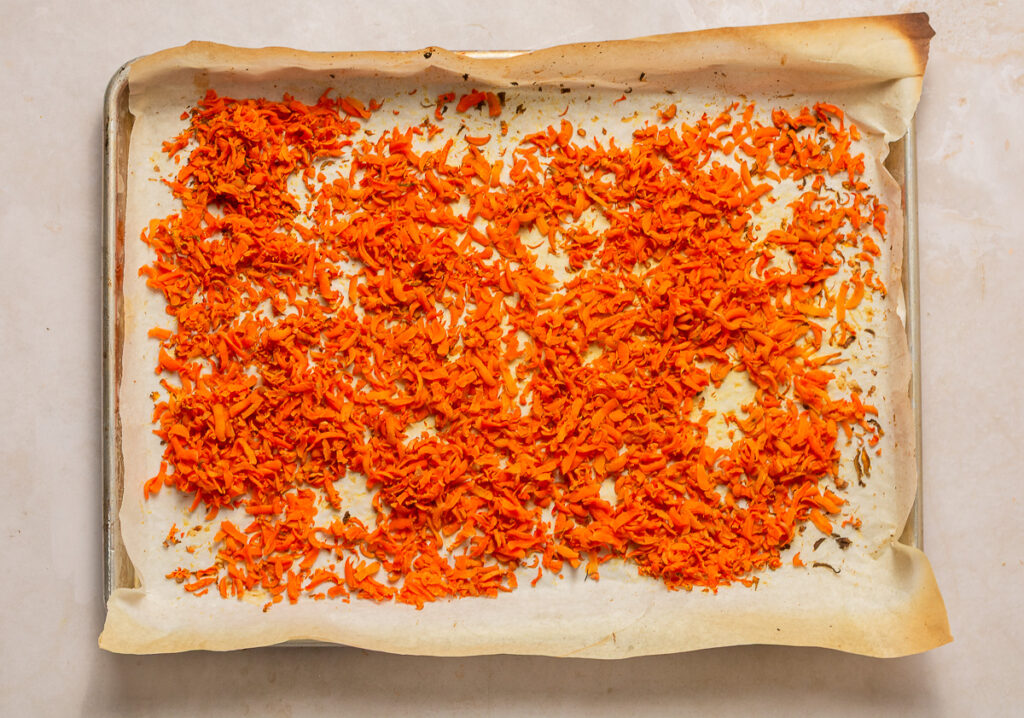
Step 2. Shred the carrots finely and spread across a baking sheet lined with parchment paper. Roast for 15 minutes on the middle rack until the carrots are wilted. Some visible browning around the edges is ok. Open the oven halfway through and use a spoon to redistribute the carrots, bringing any un-roasted carrots to the top.
Step aside when opening the oven door while roasting the carrots. They create a lot of steam which will release as soon as the door is opened. It is hot and can even burn.

Step 3. Reduce the oven temperature to 325°F for the cake. I generally like a lower baking temperature for my cakes for more even rising however in this cake the lower temperature also prevents the cake from browning too quickly along the edges.
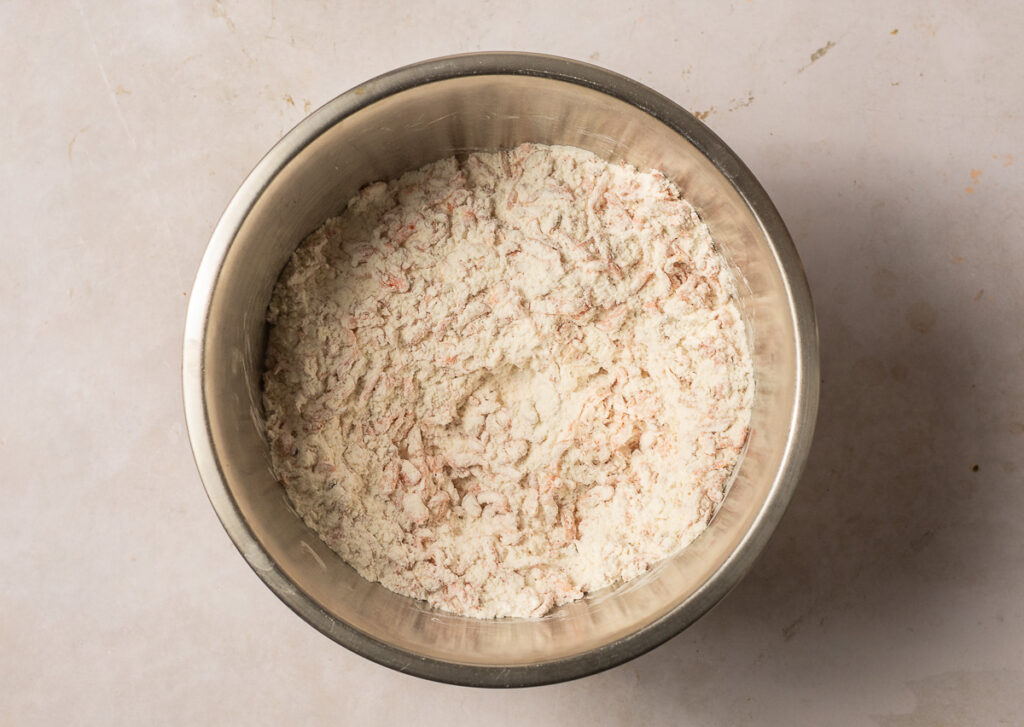
Step 4. Combine flour, the roasted carrots, crushed pecans (if using), salt and baking soda to a bowl and stir to evenly combine. Set aside.
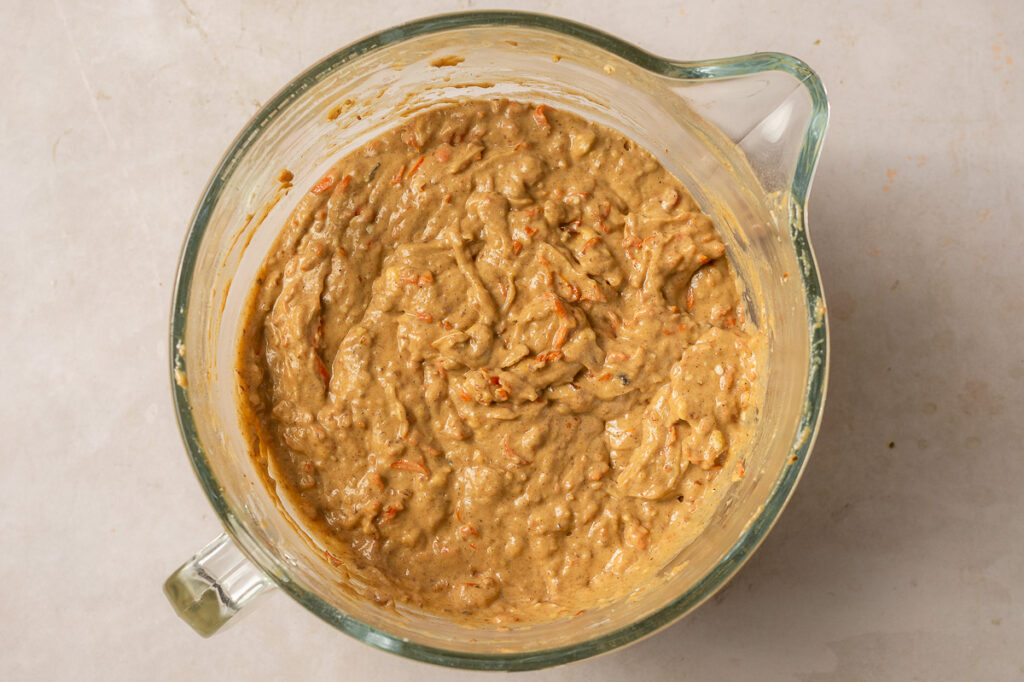
Step 5. Add the eggs, melted butter, oil, dark brown sugar, vanilla extract, cinnamon, allspice, cardamom & nutmeg to a large bowl and beat on medium speed until completely smooth.
Step 6. Add the mixture of dry ingredients set aside earlier and the yogurt to the egg mixture and beat again on low speed just until there are no more dry spots.
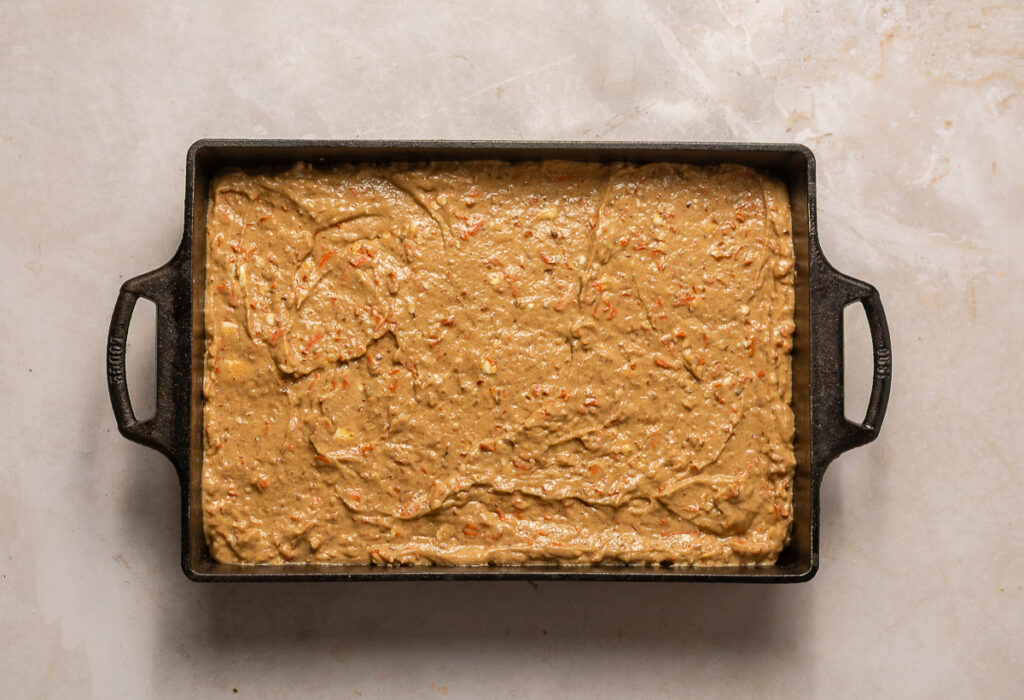
Step 7. Pour the batter into the baking dish prepared earlier and bake at 325°F for 35-45 minutes until the cake springs back easily when lightly pressed.
Step 8. Allow the cake to cool in the pan until able to handle the pan bare-handed. The cake should still be just slightly warm when flipped as it will release much more easily.
Step 9. Invert a serving plate or other cake plate on top of the baking dish and flip the baking dish to release the cake. The cake should release easily.
To avoid breaking the cake with a partial release, after flipping the cake try lifting the pan from the cake just a little bit. If the pan feels as heavy as it did taking it out of the oven this means the cake didn't release. In its inverted position with the cake plate, firmly (but gently) tap it on the counter. This should help jolt the cake away from the pan.
Step 10. Allow the, now inverted, pineapple upside-down carrot cake to completely cool before slicing.
This cake is okay to be stored at room temperature for 2 days but past that, the cake should be stored in an airtight container in the refrigerator to avoid the fruit spoiling.

Pineapple Upside-Down Carrot Cake
Ingredients
Equipment
Method
- On the stovetop, melt the butter in the baking dish over medium heat. Remove from the heat then spread the melted butter around to cover the bottom of the pan. Use your finger to spread a little of the melted butter along the sides of the pan as well.
- Spread the dark brown sugar across the bottom of the pan, using your hands to press it in.
- Drain the pineapple slices from the can well then spread them out on a plate lined with paper towels. Press the pineapple slices gently to expel any excess juice. The pineapple juice won't be incorporated in the cake but you don't have to throw it out! Add it to homemade juices or make a simple syrup.
- Arrange the pineapple slices evenly on top of the packed brown sugar in your desired pattern.
- Halve the maraschino cherries and place one half each in the center of the pineapple slices and to fill in any other gaps as desired. Set the pan aside until the cake batter is ready.
- Preheat oven to 400 °F.
- Shred the carrots finely and spread across a parchment-lined baking sheet. Roast in the preheated oven for 15 minutes on the middle rack until the carrots are wilted. Some visible browning around the edges is ok. Open the oven halfway through and use a spoon to redistribute the carrots, bringing any un-roasted carrots to the top.
- Reduce the oven temperature to 325°F for the cake.
- Combine the all-purpose flour, the roasted carrots, crushed pecans (if using), salt and baking soda to a bowl and stir to evenly combine. Set aside.
- Add the eggs, melted butter, oil, dark brown sugar, vanilla extract, cinnamon, allspice, cardamom & nutmeg to a bowl and beat on medium speed until completely smooth.
- Add the carrot/flour mixture set aside earlier and the yogurt to the egg mixture and beat again on low speed just until there are no more dry spots.
- Pour the batter into the baking dish prepared earlier and bake at 325°F for 35-45 minutes or until the cake springs back easily when lightly pressed.
- Allow the cake to cool in the pan until you are able to handle the pan bare-handed. The cake should still be just slightly warm when flipped; it will release much more easily.
- Invert a serving plate or other cake plate on top of the baking dish and flip the baking dish to release the cake. The cake should release easily. Allow the inverted pineapple upside-down carrot cake to completely cool before slicing.
- This cake is okay to be stored at room temperature for 2 days but past that, the cake should be stored in an airtight container in the refrigerator to avoid the fruit spoiling.
Nutrition
Notes
- All the ingredients should be room temperature with the exception of the melted butter in the cake which is ok to be a little warm (but not scalding).
- To avoid breaking the cake with a partial release, after flipping the cake try lifting the pan from the cake just a little bit. If the pan feels as heavy as it did taking it out of the oven this means the cake didn't release. In its inverted position with the cake plate, firmly (but gently) tap it on the counter. This should help jolt the cake away from the pan.
- Be careful opening the oven door after roasting the carrots. They create a lot of steam and can burn!
Love this recipe?
Tag @TheStushKitchen on instagram!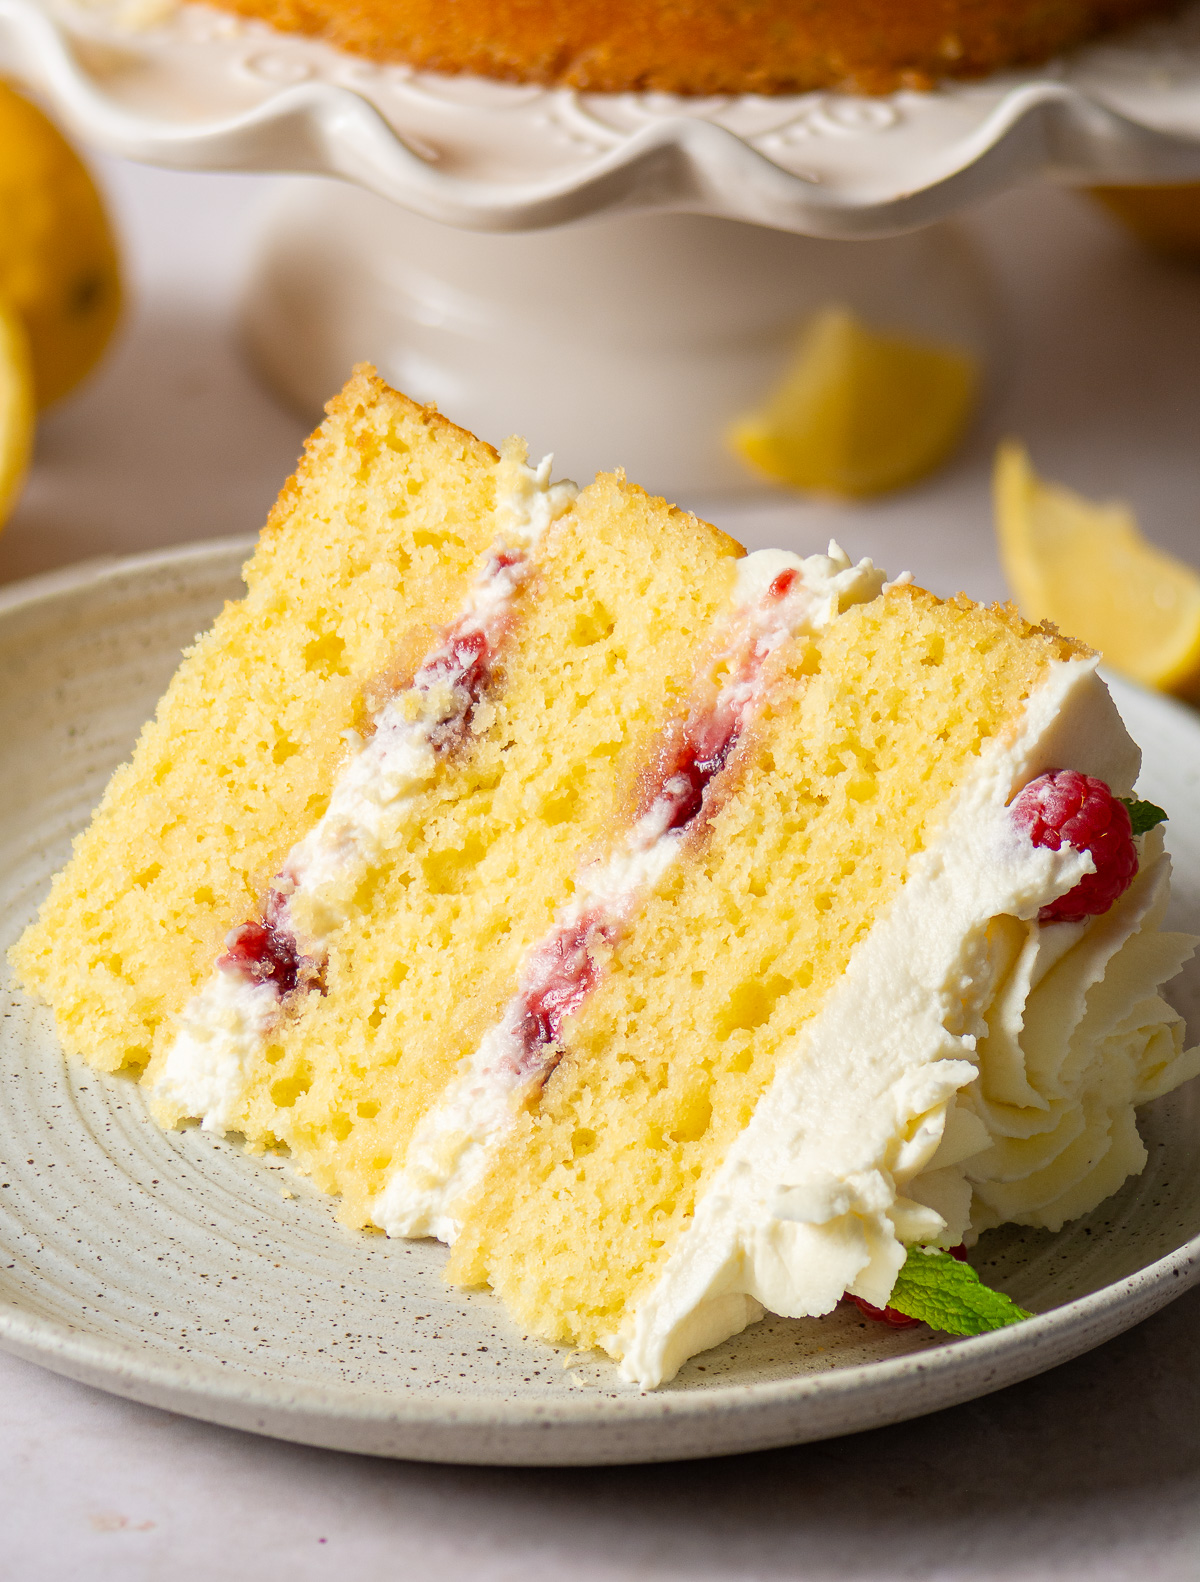
Honey Lemon Layer Cake Inspired by Meghan Markle
Equipment
- piping tips optional
- stand mixer for whipped cream
Ingredients
For the Lemon Olive Oil Cake Layers
- 390 grams cake flour
- 370 grams granulated sugar
- 300 grams full-fat sour cream, room temperature
- 160 grams olive oil
- 4 large eggs, room temperature
- 3 large lemons, zest only
- 1 ½ tablespoon baking powder
- 1 teaspoon salt
For the Honey-Lemon Simple Syrup
- 176 grams honey
- 58 mL hot water
- 1 large lemon, zest only
For the Mascarpone Chantilly Cream
- 496 mL heavy whipping cream, cold
- 113 grams confectioner's (powdered) sugar
- 340 grams mascarpone cheese
- 1 teaspoon vanilla bean paste or vanilla extract
Filling & Toppings
- 170 grams raspberry preserves
- fresh raspberries optional for topping
- mint (or lemon verbena) leaves optional for topping
Instructions
How to Make the Cake Layers
- Preheat oven to 325°F.
- Add the lemon zest and sugar to a large mixing bowl and rub the zest into the sugar for about 2 minutes. The sugar will resemble kinetic sand when you're done.
- Add the rest of the dry ingredients - the sifted cake flour, baking powder & salt to the sugar/zest mixture and stir with a spoon to evenly distribute everything.
- In a separate bowl combine all the wet ingredients adding all the olive oil, sour cream and eggs. Whisk to break up the eggs and mix til smooth.
- Add the wet ingredients to the dry and stir until the batter is smooth.
- Prepare three 8-inch cake pans with baking spray and divide the batter equally among the 3 pans. You can also add a parchment circle to the bottom of the pan for added ease of removal.
- Bake on the middle rack of your oven for 20-30 minutes or until the top of the cake spring back when touched or when a skewer comes out with only a few crumbs.
- While the cakes bake, make the honey glaze. Add the hot water, honey and lemon zest to a heat-proof bowl and mix to incorporate. Set aside until the cakes are ready.
- When the cakes are done allow them to cool slightly then, while still warm, poke with a toothpick or cocktail pick. Spoon the honey-lemon syrup over the top of the cake and down the edges while the cake is still warm. Repeat this with all three cake layers. Allow the cakes to continue to cool. If leaving overnight to assemble the next day, over the layers with plastic wrap.
How to Make the Mascarpone Chantilly Whipped Cream
- Add the cold heavy whipping cream, confectioner's sugar & vanilla bean paste to the bowl of a stand mixer and whip on high speed until it forms soft peaks. The peak formed at the end of whisk should flop over like a Santa hat when inverted.
- Add all of the mascarpone cheese and whip until stiff peaks form and the whipped cream is smooth. This step should take less than a minute.
- Transfer the whipped cream to a piping bag affixed with a piping tip if using.
Assembling the Honey Lemon Cake
- Place your cooled cake layer on a cake stand or plate and pipe a border of whipped cream on top of the cake along the edge. Make sure the whipped cream border doesn't hang over the edge as this border will make the cake unstable. If you have any cake layers that are noticeably taller than the others, use this as the base since using them in the middle or top can cause your cake to topple or collapse on itself.
- Pipe another circle in the center of the cake and then a single dollop in the center. It should resemble a target. Fill the gaps in with your raspberry preserves.
- Repeat steps 1 & 2 with a second cake layer.
- Add your last cake layer on top. I like to invert this one so the perfectly flat bottom is now the top of the cake. This makes it easier for you to spread an even layer of the whipped cream that looks crisp!
- Using an offset spatula spread a thin layer of the whipped cream on the top of your cake. To get a clean edge, use a paddle motion to spread it over the edge slightly. Then, holding the offset spatula at a 45° angle pointed towards the floor, drag the excess frosting down the side of the top cake layer. Repeat this around the edge of the top layer.
- Skip this step if you want to forego the piped rosettes on top. Using a rosette tip, pipe some rosettes in a a crescent pattern on top of the cake. For the prettiest results, vary the size and pattern.
- Place your fresh raspberries wherever you like on top of the cake and add your herb leaves next to them.
- Slice and enjoy! Because of the whipped cream, this cake does need to be refrigerated if it won't be served immediately but since this is an oil-based cake it will be soft even if served cold!
Notes
- Make the whipped cream right before assembling your cake since it starts to "set" slightly about 10 minutes after being made which can result in piping that isn't as smooth since the cream is a little stiffer. If you do make it ahead of time though simply return it to you mixer and whip for 10-20 seconds.
- If you have any cake layers that are noticeably taller than the others, use this as the base since using them in the middle or top can cause your cake to topple or collapse on itself.
- When piping the rosettes for a full rosette, pretend you are piping a mini spiral. This'll be 2-D so only pipe one layer for the rosettes.
For little rosebuds simply pipe dots. Vary the size by applying more pressure to the piping bag or holding it place for longer amounts of time.

I love carrot cake and LOVE pineapple upside down cake so this recipe was right up my alley! This cake is so moist and so easy!! I host a lot so I'll be pulling this recipe out when I want something that's low effort